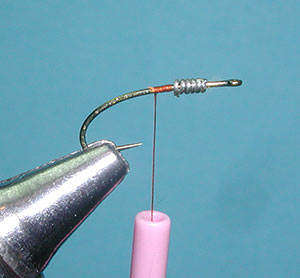


| 1. Wrap lead weight around the shank about 5-6 times in the thorax region just behind the eye. Secure with thread wraps and wrap the thread back to just above the barb. |
|
|
| 2. Select three Pheasant Tail fibers and even the tips. Separating the fibers and changing the order will help keep the fibers from interlocking. |
|
|
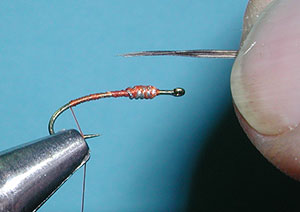
| 3. Tie in the 3 Pheasant Tail Fiber tips for a tail, length about 1/2 shank. Splay the fibers with a wrap underneath the fibers. |
|
|
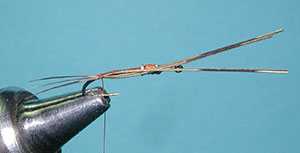
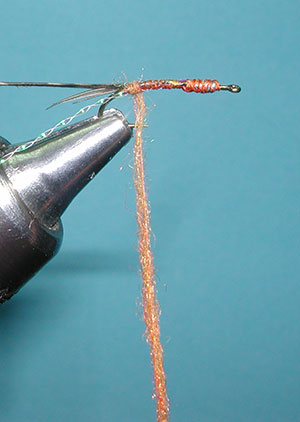
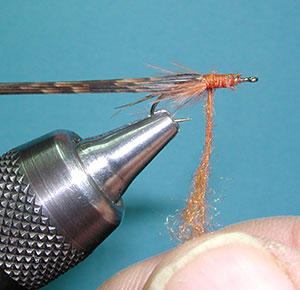
| 4. Tie in a piece of Pearl Krystalflash ribbing at base of tail and a narrow segment of turkey tail that is about 4 fibers in width. |
|
|
| 5. Apply the dubbing blend to the thread and lock in the first fibers of the dubbing to the hook shank with a tight wrap. This anchor placement will allow you to twist the dubbing tighter around the thread. |
|
|
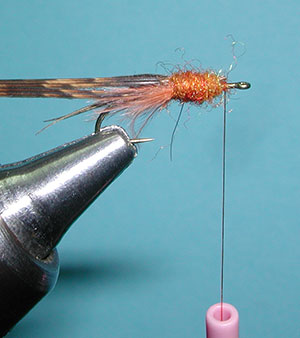
| 6. Dub a tapered abdomen up to the midpoint of the shank and secure with some thread wraps. |
|
|
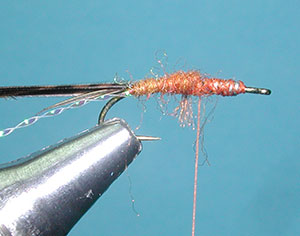
| 7. Bring the turkey segment over the abdomen for a shellback, securing with a couple of thread wraps. |
|
|
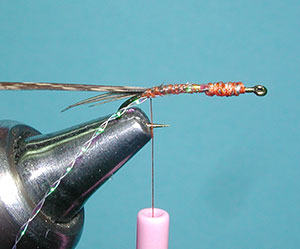
| 8. Spiral wrap of the krsytalflash up to the thorax region and secure with a couple of tight thread wraps within the thorax region. Trim off the tag end of the shellback and the Krystalflash. |
|
|
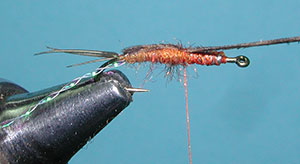
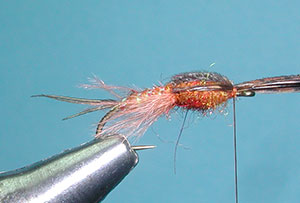
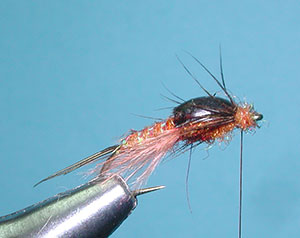
| 9. Attach a section of Dark Mottled Turkey tail that is about the width of the hook gape for a wingcase at the top of the hook shank behind the eye. Secure with thread wraps over the thorax region. Tie in some fibers of tan marabou to both sides of the hook shank at the base of the thorax and adjust the length of the fibers so that they do not exceed the length of the abdomen. |
|
|
| 10. Secure with thread wraps. |
|
|
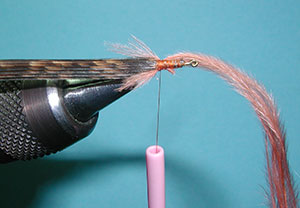
| 11. Apply dubbing to the thread and dub a thorax that is twice the diameter of the abdomen. |
|
|
| 12. Leave some space behind the eye. |
|
|
| 13. Bring the Wingcase over the thorax and secure with 5-6 thread wraps. |
|
|
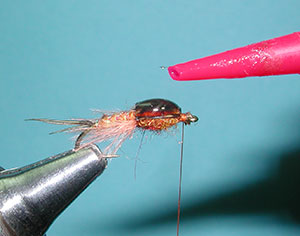
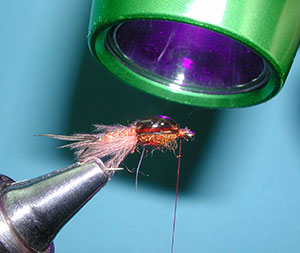
| 14. Epoxy the wingcase with a drop of thick UV Fly Finish. |
|
|
| 15. Harden the epoxy with a UV lamp. It only takes seconds. |
|
|
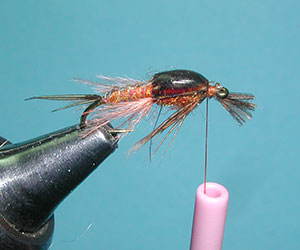
| 16. Attach some fibers on each side of the thorax for legs. The legs should extend to about half the abdomen. |
|
|
| 17. Trim off the tag ends of the leg fibers and secure with a few tight thread wraps. |
|
|
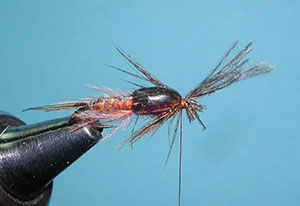
| 18. Dub a small head and whip finish. |
|
|
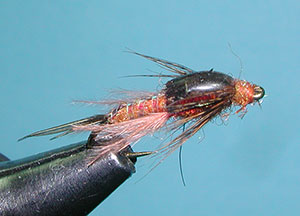
| 19. The finished Poxyback PMD Nymph. |
|
©2021 Steve Schalla
This page is not to be copied without
my explicit permission.