| |
|
|
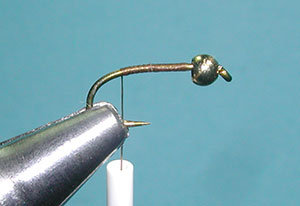
1) Mash down the barb and slip on the bead to the hook. Attach the hook to the vise.
|
 |
|
2) Attach the thread behind the bead and lay a thread foundation to the bend of the hook.
|
 |
|
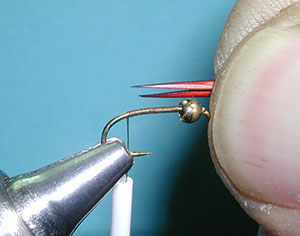
3) Clip a pair of Goose Biots and arrange the pair so that they are facing outward. Measure the length of the biots to about one hook shank in length.
|
 |
|
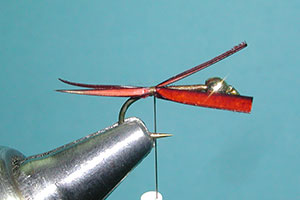
4) Secure the biots at the bend of the hook with a couple of thread wraps. The biots should straddle each side of the hook shank.
|
 |
|
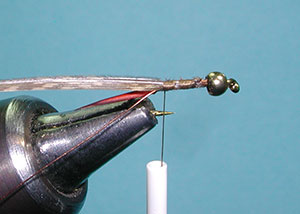
5) Secure the butt ends of the biots to the hook shank and trim off the excess material. Attach a copper wire ribbing to the top of the hook shank and secure to the tail tie in position.
|
 |
|
6) Clip a segment of Mottled Oak Turkey that is about one half the gap of the hook. Secure the turkey slip to the top of the hook shank in front of the tail.
|
 |
|
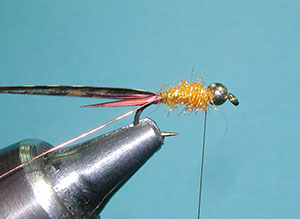
7) Apply orange ice dubbing to the thread and twist it tightly. I will lock a few strands of the ice dubbing to the shank with one wrap and twist the material around the thread for a tighter noodle.Wrap the dubbing forward creating a tapered body leaving some space between the body and the bead.
|
 |
|
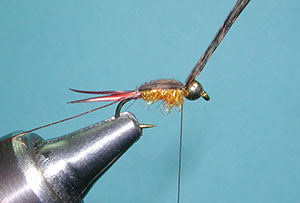
8) Bring the turkey slip over the body creating a shellback. Secure with a couple of thread wraps.
|
 |
|
9) Wrap the copper wire ribbing forward with 4-5 wraps and secure just behind the bead. Clip off the excess turkey and wire.
|
 |
|
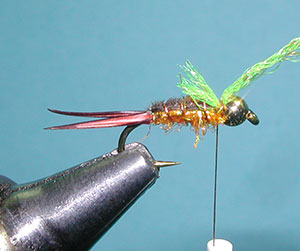
10) Clip a length of Flat Diamond Braid and secure the braid to the top of the hook shank behind the bead. Trim the braid so that the length shoud be just beyond the midpoint of the shank. This will be the wing bud.
|
 |
|
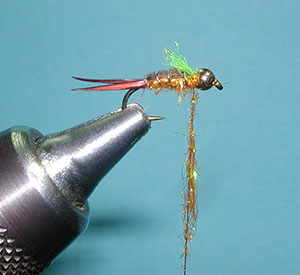
11) Trim off the tag end of the braid and apply some more orange ice dubbing to cover the base of the wing bud.
|
 |
|
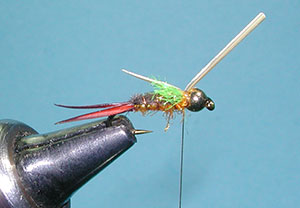
12) Clip off two Golden Stone colored biots and attach each one to the side of the wing bud behind the bead with the curve of the biot facing outward. I like to do this one at a time. Adjust the biot length so that it does not go beyond the body. Secure with a couple of tight wraps.
|
 |
|
13) Attach the second biot behind the bead just to the other side of the wing bud. Secure with a couple of tight thread wraps.
|
 |
|
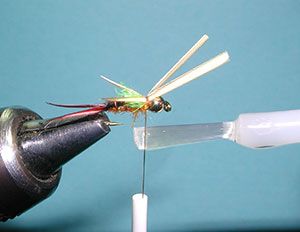
14) Biots are slippery. A small application of zap a gap at the thread will help to secure these biots. Apply 2-3 more thread wraps once the application is made.
|
 |
|
15) Trim off the excess wing strands and apply additional orange ice dubbing over the wing thread wraps. Twist some dark brown ice dubbing around the thread.
|
 |
|
16) Wrap a couple turns of the dubbing. You can use your thumbnail to push the material behind the bead.
|
 |
|
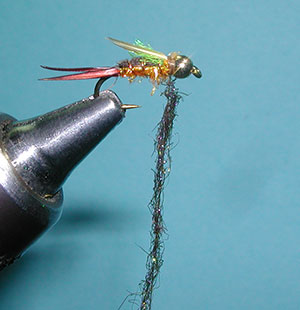
17) Whip Finish behind the bead.
|
 |
|
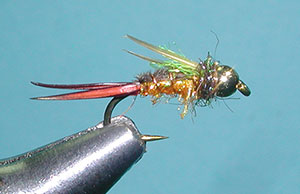
18) The finished Psycho Prince
|
 |
|
|
|
|
|