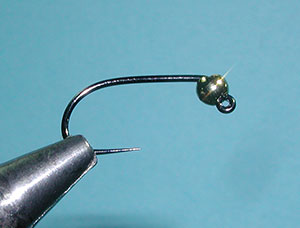


| 1. Slip a slotted tungsten bead onto the hook. This is a size 1/8" bead, so you may want to use hook tweezers. The hook is a Tiemco 403BLJ size 10, a barbless jig hook. |
|
|
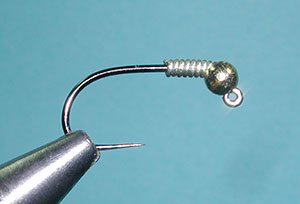
| 2.Wrap some leadfree wire behind the bead for extra weight and to securely maintain the position of the bead. |
|
|
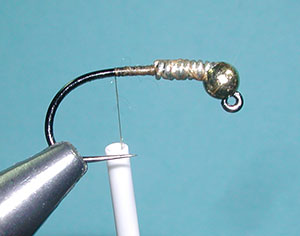
| 3. Attach the thread behind the wire wraps and secure the wire with thread wraps. |
|
|
|
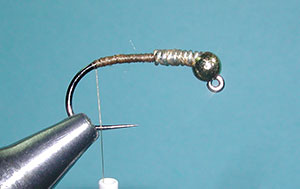
4. Continue the thread as a foundation down to the bend of the hook. |
|
|
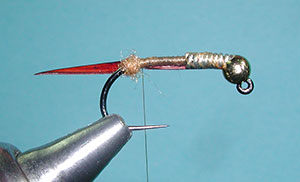
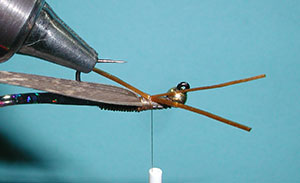
| 5. Apply a small ball of dubbing to the bend of the hook. This will be the tail tie-in position. |
|
|
| 6. Clip off two goose biots and attach one on each side of the hook shank with the length of the biot being about the same as the hook gap. |
|
|
|
7. The dubbed ball will splay the biots to a 45 degree angle. |
|
|
|
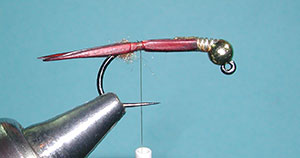
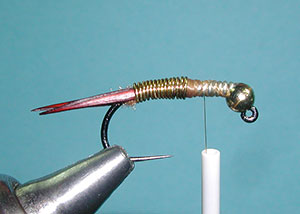
8. Secure the biots with thread wrap and clip off the tag ends. Attach a piece of wire to the top of the hook shank. This wire will be used for the abdomen. |
|
|
|
9. Next wrap a tapered thread underbody up to the thorax which will be at the midpoint of the shank. |
|
|
|
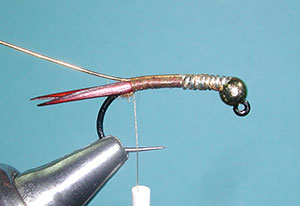
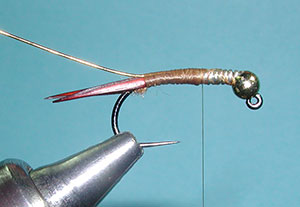
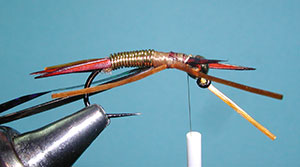
10. Wrap the wire forward with touching wraps. Wrap up to the midpooint position and secure with thread wraps. Clip off the tag end of the wire. |
|
|
|
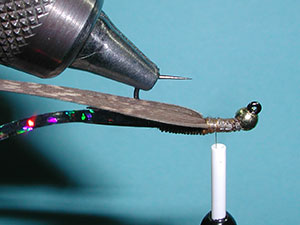
11. Inverting the hook, secure a piece of Holographic Tinsel to the hook shank behind the bead down to the midpoint. This pattern will ride upside down due to the weight postioned on the jig style hook. |
|
|
|
12. Next, attach a slip of Turkey Quill behind the bead and secure also to the midpoint of the shank. |
|
|
|
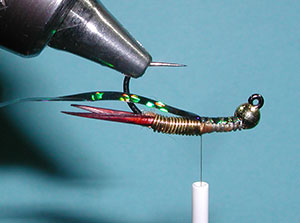
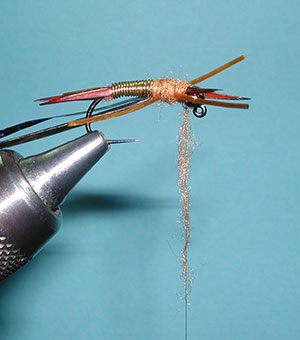
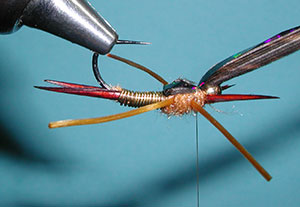
13. Bring the thread to the center of the thorax region and secure two one inch strands of Life Flex with two thread wraps. Orient the strands so that they are parallel to the hook shank and add 2-3 additional wraps of thread to secure. |
|
|
|
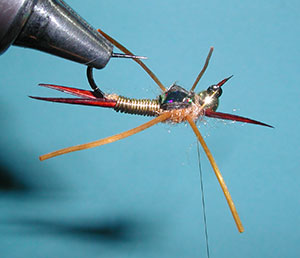
14. Pull each strand to the side of the hook shank and secure with some additional tight thread wraps. |
|
|
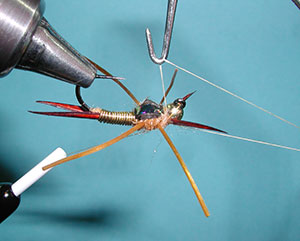
| 15. The antennae biots need to be added. It would have been easier to apply these biots just behind the bead prior to the legs being attached, but I got it done. |
|
|
|
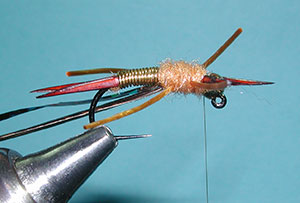
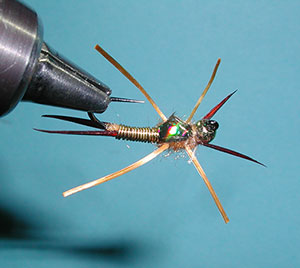
16. Dub the thread with Antron dubbing and apply the dubbing behind the legs, in the center of the legs, and in front of the legs. It may take 3-4 applications of dubbing. |
|
|
|
17. The dubbed thorax should be twice the diameter of the abdomen. |
|
|
| 18. Invert the hook once again and bring the Turkey Quill slip over the dubbed thorax for a wingcase. Secure the quill behind the bead. |
|
|
| 19. Next, pull the Holographic Tinsel over the thorax as part of the wingcase. Secure with tight thread wraps behind the bead. |
|
|
|
20. Trim off the tag ends of the quill and tinsel and secure with a few more wraps. Apply some dubbing as a collar. |
|
|
|
21.Whip finish behind the bead. |
|
|
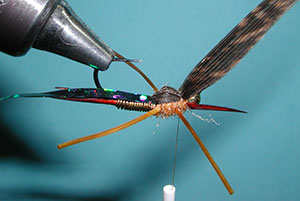
| 22. The finished Tungsten Jigstone |
|
©2023 Steve Schalla
This page is not to be copied without
my explicit permission.