Sub-Total: $0.00
Hackle Stacker – a wild and crazy guy
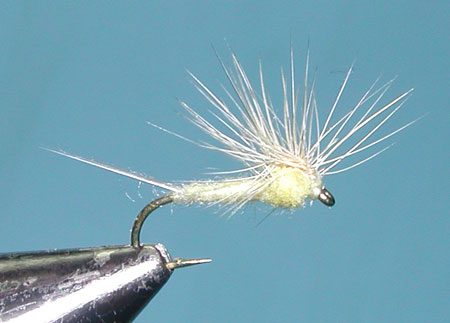
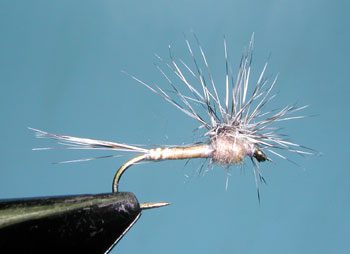
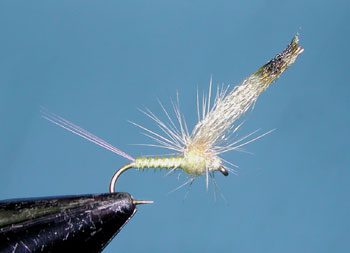
Hackle Stacker, PMD
Tying Instructions
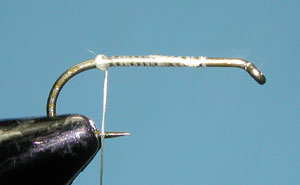
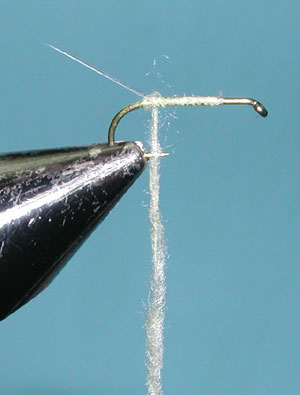
1. Attach the thread to the hook shank and lay a thread foundation to the bend of the hook. At that position create a small bump of thread.
2. Clip 4-5 microfibbetts, keep the tips even. Measure the tailing material to be equal to the shank length of the hook. Position the material just behind the thread bump against the shank in front of you. A thread wrap will bring the material to the top of the shank and you can wrap the excess material to the top of the shank until you reach the 70% mark of the hook shank.
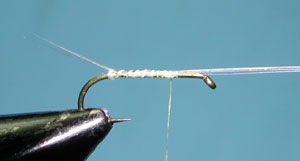
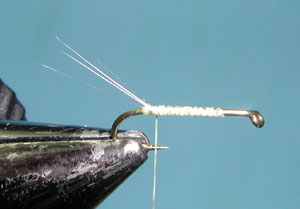
3. Wrap the thread back to the tail tie-in position and put your thumb under the microfibbetts behind the thread bump. Another firm thread wrap over the tailing material will splay the microfibbetts from the tension put on them against the thread bump.
4. Apply a small amount of dubbing to the thread and secure the fibers to the shank with one wrap. You can increase the firmness of the dubbing by twisting the material on the thread once it’s anchored to the hook shank.
5. Wrap the dubbing forward to the 70% position for a tapered body.

6. Cut a piece of 3″ nylon thread and match up the ends of the piece. Anchor the ends just behind the eye of the hook and secure the nylon thread down to the 70% position.
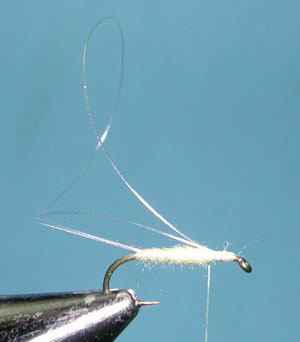
7. Build a thread base on the nylon thread loop. I find that rotating the loop towards you will help. Hold the loop with one hand as you move the thread bobbin around it with your other hand. I’ll switch hands to facilitate the movement, but always keeping tension of the loop.
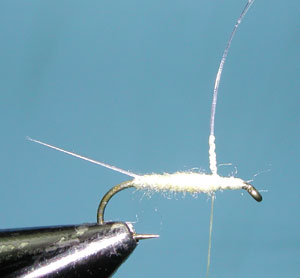
8. Obtain a hackle sized to the hook. Clean the butt fibers of the hackle off so that enough bare quill is available to anchor the hackle to the shank at the base of the nylon loop post and enough bare quill to anchor up the post about 1/3 the shank length. Again, having the loop facing you horizontally, will assist you in anchoring the quill to the base of the post. Make sure to keep the tension on the loop to maintain control.
9. Attach hackle pliers to the end of the hackle and wrap the hackle down the post about 6-7 wraps. Again, keeping the loop horizontal, toward you….I find this method easier to hold the loop and control the wrapping of the hackle pliers. The last wrap will go over the hook shank at the base of the post and you secure the hackle with a couple of thread wraps. Now rotate the fly back into the upright position.
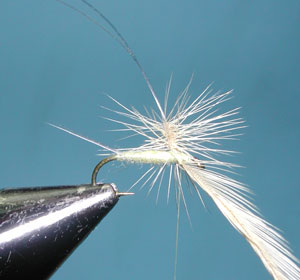
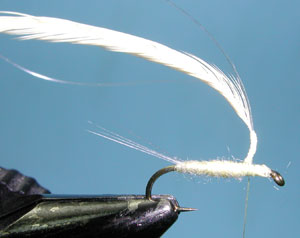
10. Clip of the excess hackle material and snip out any errant fibers. Pull the wrapped hackles back with your left hand and secure the last hackle wrapped at the base of the post with a few more thread wraps. Apply the thorax dubbing with a tight mound just in front of the hackle post. The thorax should be about twice the diameter as the abdomen.
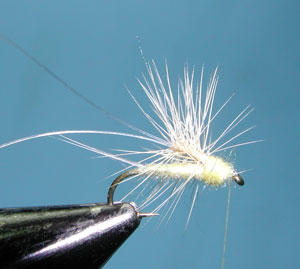
11. Bring the nylon loop over the dubbed thorax, securing the nylon just behind the eye. The hackles should be positioned on top of the dubbed thorax.
12. Bring the nylon loop back towards the tail and add a number of additional wraps to secure the nylon thread. Whip Finish.

13. Trim of the excess nylon thread..

| Materials
to Order Material, click the link |
|
|---|---|
| Hook | TMC 100 #16-20 |
| Thread | Uni-thread Light Cahill 8/0 |
| Body | Pale Yellow Superfine Dubbing |
| Thorax | PMD Superfine Dubbing |
| Tail | Light Dun Microfibbetts |
| Post | 6X tippet |
| Hackle | Ginger Hackle |
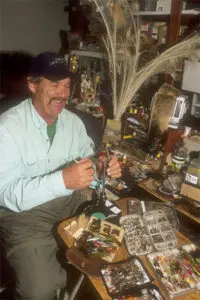
Bob Quigley
Hackle Stacker
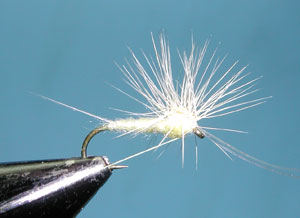
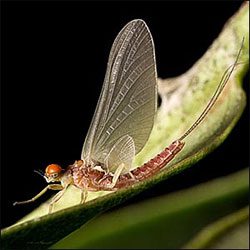
The Hackle Stacker is a mayfly emerger pattern. It utilizes a paraloop method of wrapping hackles around a looped monofilament and bringing the monofilament over a dubbed thorax to a tie-off location just behind the eye. The result is a group of hackles residing upon the top of the thorax keeping the hackles well above the hook shank. This allows the fly to submerge itself well into the surface film and results in better hook-ups due to the hook placement being lower in the water.
The late Bob Quigley is often cited as the developer of this fly although the technique can also be attributed to the late Jim Cramer of Bodega Bay, CA and the late Ned Long of Tahoe City, CA, who used it as well. Ned received the Buz Buzsek award in 1996 and mentioned that the “pullover” technique was not his invention either but he improved on the technique. Often, many will fish this pattern behind a hi-vis dun using the dun as an indicator. Rather than utilizing a material such as 7X monofilament as the hackle post, other materials can be used such as Z-lon, Poly Yarn, Floss, and thread. The stiffer materials can be used as a wing post without a gallows tool.
Variations
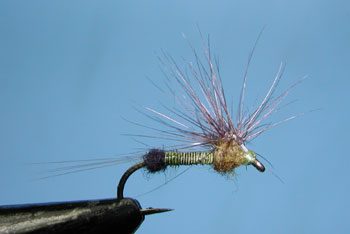
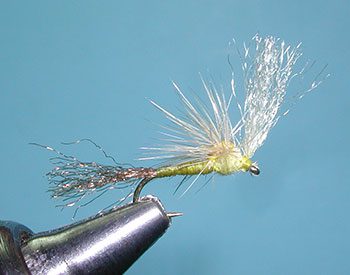
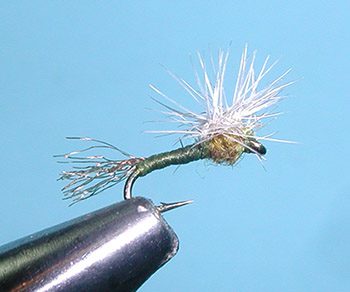
Quigley’s choice of materials for tailing was often some fibers of z-lon or microfibbetts. The body can be Superfine dubbing, Turkey Biots, or Dyed Quill. Bob developed a few variations from this pattern. One is the Hackle Stacker Flag Dun which incorporates a section of z-lon for the wingpost and wing. This can be very helpful in sighting the fly.
Another variation is hisSparkle Stacker, which uses thread or floss for the body, poly yarn for the wing, and z-lon as tailing material. Bob combined the two and came up with theSparkle Flagwhich utilizes a Z-lon tail and a thread body for smaller patterns such as PMD’s in sizes 18-22. The hackle is wrapped around the Z-lon wing post and once pulled over the dubbed thorax, it serves as a wing. The “flag” not only serves as a wing but also allows you to sight the pattern more easily. The Loopy Cripple Stackeris another variation as well using poly yarn as the wing and looping the material over the hackles.
Variations
Hackle Stacker-Callibaetis
| Hook | TMC 100 #14-16 |
| Thread | Uni-thread Gray 8/0 |
| Body | Gray Turkey Biot |
| Thorax | Callibaetis Superfine |
| Tail | Grizzly Spade Hackle Fibers |
| Post | 6X tippet |
| Hackle | Grizzly Hackle |
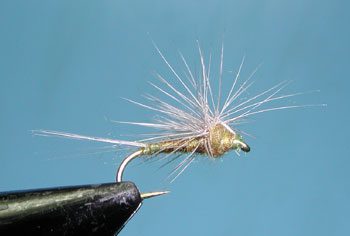
Hackle Stacker-BWO
| Hook | TMC 100 #16-22 |
| Thread | Uni-thread Olive 8/0 |
| Body | BWO Superfine Dubbing |
| Thorax | BWO Superfine Dubbing |
| Tail | Light Dun Microfibbetts |
| Post | 6X tippet |
| Hackle | Med. Blue Dun Hackle |
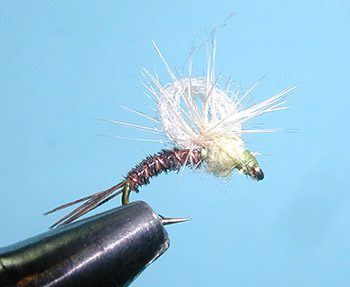
Hackle Stacker-Female Baetis
| Hook | TMC 100 #16-22 |
| Thread | Uni-thread Olive 8/0 |
| Egg Sac | Black Superfine |
| Body | Olive Dyed Quill |
| Thorax | BWO Superfine Dubbing |
| Tail | Light Dun Microfibbetts |
| Post | 6X tippet |
| Hackle | Dark Blue Dun Hackle |
Hackle Stacker Flag Dun-PMD
| Hook | TMC 100 #16-20 |
| Thread | Uni-thread Light Cahill 8/0 |
| Body | Turkey Biot, PMD |
| Thorax | PMD Superfine |
| Tail | Dark Dun Microfibbetts |
| Wingpost | Cream Z-lon |
| Hackle | Ginger Hackle |
Sparkle Flag Dun-PMD
| Hook | TMC 100 #18-22 |
| Thread | Uni-thread Yellow 8/0 |
| Body | Uni-thread Yellow 8/0 |
| Thorax | PMD Superfine |
| Shuck | Z-Lon ,Olive Brown |
| Wing | Cream Z-lon |
| Hackle | Light Ginger Hackle |
Sparkle Stacker (BWO)
| Hook | TMC 100 #20-22 |
| Thread | Uni-thread Olive 8/0 |
| Body | Uni-thread Olive 8/0 |
| Thorax | BWO Superfine |
| Shuck | Z-Lon, Olive Brown |
| Post | White Antron Yarn |
| Hackle | Dun Hackle |
Loopy Cripple-PMD
| Hook | TMC 2487 #14-20 |
| Thread | Uni-thread Light Olive 8/0 |
| Body | Pheasant Tail |
| Thorax | PMD Superfine |
| Ribbing | Copper Small Wire |
| Tail | Pheasant Tail |
| Wing | Light Gray Poly Yarn |
| Hackle | Light Ginger Hackle |