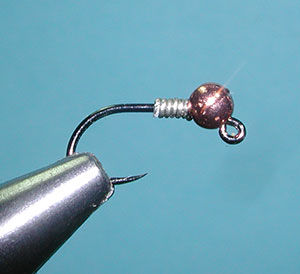

| 1. Slide the slotted bead onto the hook behind the eye. Apply 5-6 wraps of 0.015 leadfree wire behind the bead. |
|
|
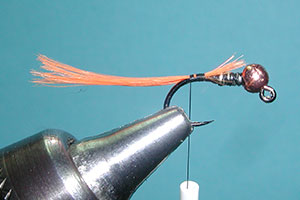
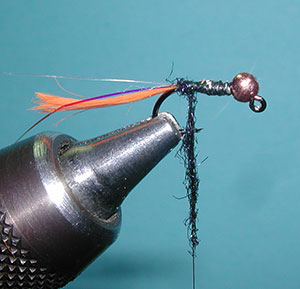
| 2. Attach the thread behind the wire wraps and secure the wire wraps. Lay a ramp of thread between the wire wraps and the hook shank. Snip three strands of Flat Waxed Nylon and secure the strands to the top of the hook shank behind the wire wraps. |
|
|
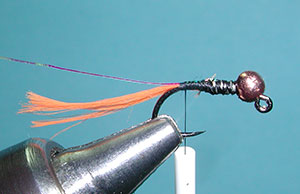
| 3. Secure a strand of 1/100" Opal Flashabou to the top of the hook shank. |
|
|
|
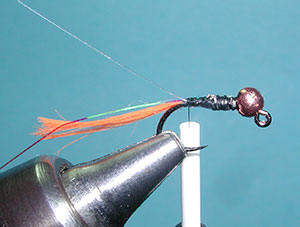
4. Next, secure a strand of 5X tippet to the top of the hook shank. |
|
|
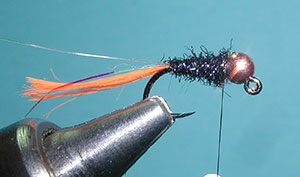
| 5. Apply Ice Dubbing sparsely to the thread and lock the fibers to the hook shank at the bend of the hook with one wrap. Then, twist the dubbing around the thread to create a rope. | |
|
|
6. Wrap the dubbed rope from the bend of the hook to behind the bead for a tapered body. |
|
|
| 7. Spirol wrap the flashabou with 4-5 turns up to the bead and secure with thread wraps. | |
|
| 8. Next, counterwrap the tippet material 4-5 times up to the bead to protect the flashabou. Secure with thread wraps. | |
|
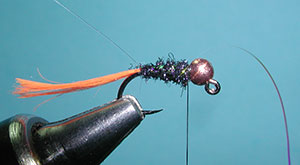
| 9. Prepare the hackle collar with a CDC feather that has a prominent central quill. Pull off the fibers from one side of the quill. You can also adjust the length of the CDC fibers at this time by pinching off the portions that exceed the length you desire. |
|
|
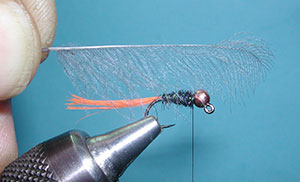
| 10. Position the CDC feather with the tip just behind the bead and secure the feather with thread wraps. The side that is bare will be the side that is laid down behind the bead. |
|
|
| 11. Apply 1-2 wraps, stroking back the fibers to keep them from being trapped. Secure with thread wraps behind the bead. |
|
|
|
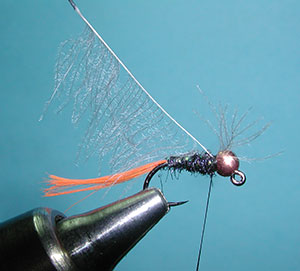
12. Trim off the tag end of the CDC feather. |
|
|
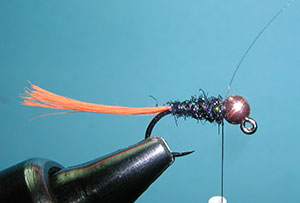
| 13. This can be a good time to trim the tag. It should be short, about even with the bend of the hook. | |
|
|
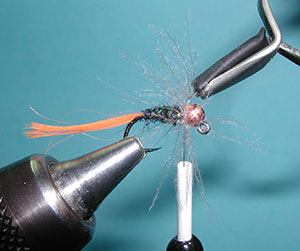
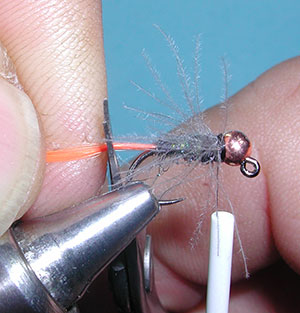
14. Apply some ice dubbing for a hot spot collar. Not much is necessary. |
|
|
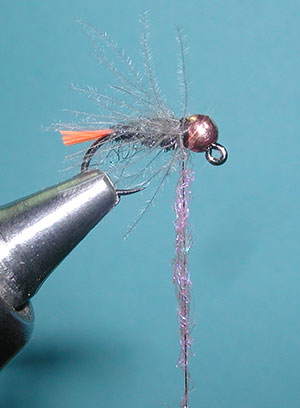
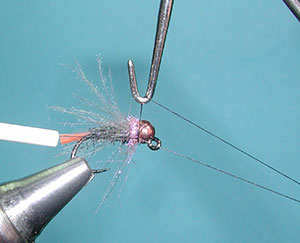
| 15. 1-2 wraps of the dubbing should be enough for the hot spot. Finish the pattern with a whip finish behind the bead. | |
|
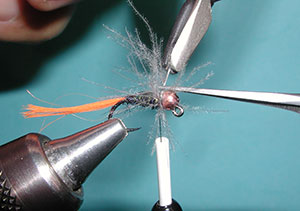
| 16. The finished Blowtorch. | |
©2023 Steve Schalla
This page is not to be copied without
my explicit permission.