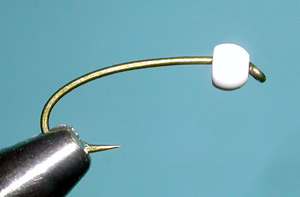
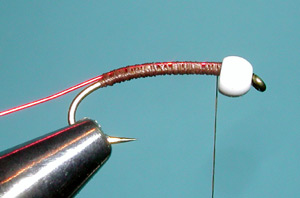

| 1. Attach a white painted bead to the hook. I'm using a size 7/64" bead on a size 14 TMC 2302. Use 1/8" beads on hook sizes 10-12 hooks |
|
|
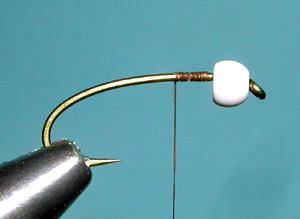
| 2. Attach the thread behind the bead. Don't worry about anchoring the bead as the body material will do that. |
|
|
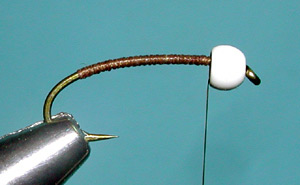
| 3. Wrap a thread foundation to the bend of the hook just above the point of the barb. |
|
|
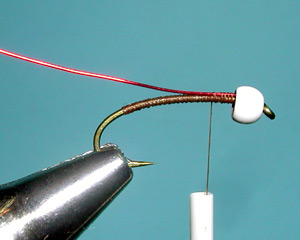
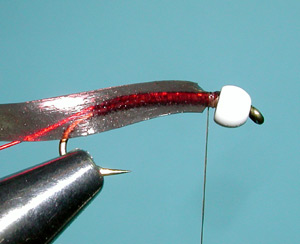
| 4. Attach the wire ribbing to the top of the hook shank with the wire inserted within the bead cavity. Secure with thread wraps. |
|
|
| 5. Secure the wire along the top of the hook shank with thread wraps to the bend of the hook and wrap back up to the bead. |
|
|
| 6. Take a piece of Scudback and trim the end into a point. The material is secured to the top of the hook shank with the thread wraps enveloping the material arouind the shank. |
|
|
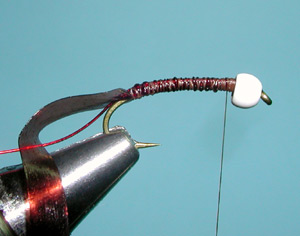
| 7. Secure the scudback to the bend of the hook and wrap the thread back to the bead. |
|
|
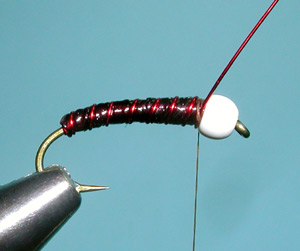
| 8. Wrap the scudback with overlapping wraps up to the bead and secure with thread wraps. Trim off the tag end of the scudback. |
|
|
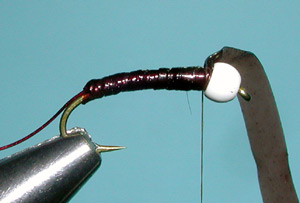
| 9. Wrap the wire ribbing forward with about 6-7 wraps and secure at the bead. Trim off the tag end of the wire by moving the wire back and forth. It will break at the bead. Do not use scissors to cut the wire. |
|
|
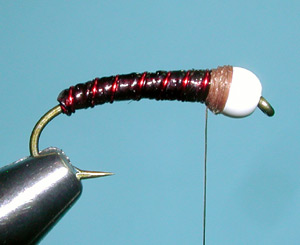
| 10. Create a thread thorax behind the bead with the thread building up slightly on the bead. Whip Finish. |
|
|
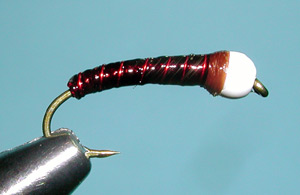
| 11. Optional: a coating of SuperGlue or Head Cement will bring more durability to the pattern as well as an enhanced translucency. I'm using Sally's Hard As Nails, Clear. Do not coat the bead. |
|
|
| 12. The finished fly. |
|
©2023 Steve Schalla
This page is not to be copied without
my explicit permission.