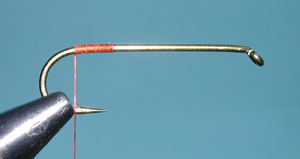

| 1. Secure the thread on the shank just above the hook point. Wrap the thread back towards the bend of the hook just above the barb. |
|
|
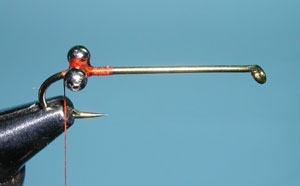
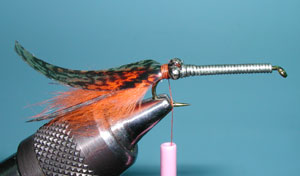
| 2. Secure a small bead chain eye at the bend of the hook and secure with 8-9 cross wraps of thread. The add a few wraps behind the bead chain as a foundation for securing the rabbit strip. Add a drop of superglue to the thread securing the bead chain. |
|
|
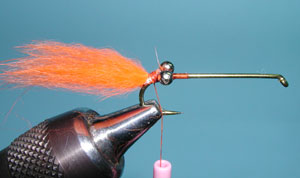
| 3. Cut a small square of hide from the rabbit strip. Attach the hide to the shank just behind the bead chain with tight thread wraps. |
|
|
|
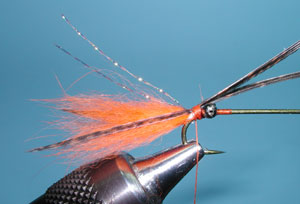
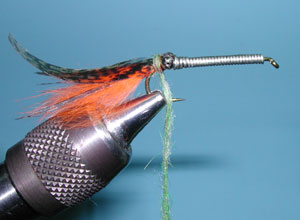
4. Snip a couple of feather segments from a Turkey tail that contain 3-4 fibers. Position the feather segments so that they splay at an angle with the curvature facing out on the top of the small hide just behind the bead. The length of the turkey segments should not exceed the length of the rabbit fur. |
|
|
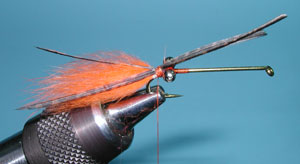
| 5. Wrap a small strand of Krystal Flash around the thread and use the thread to position the strand between the turkey segments. Add a couple of wraps to secure. Trim the Krystal Flash so that it is equal in length to the rabbit fur. | |
|
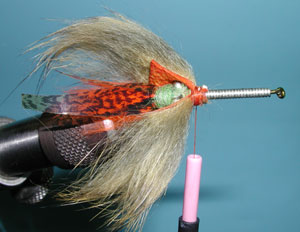
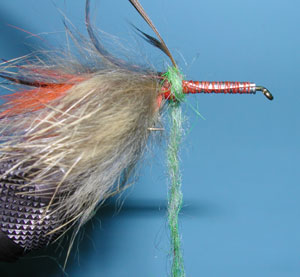
| 6. Wrap the thread over the bead chain and secure some of the turkey segment tag ends just in front of the bead chain, then trim off the excess. | |
|
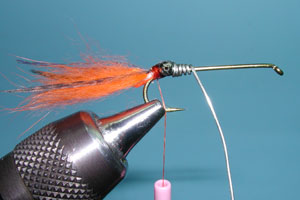
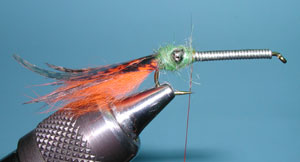
| 7. Cut a piece of lead-free wire about 6 inches in length. Wrap the wire around the hook shank from the bead chain to about 1/16th inch from the eye of the hook. | |
|
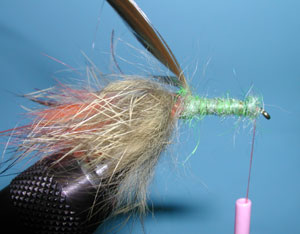
| 8. Add a few drops of superglue to the leadwraps to keep it secure. | |
|
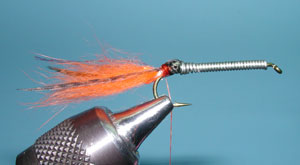
| 9. Cut a section of Thin Skin so that it is a little longer than the hook length and tapered. Trim the corners of the piece to get a coffin shaped segment. | |
|
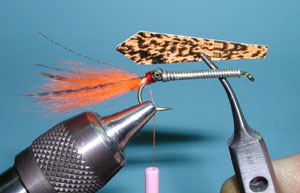
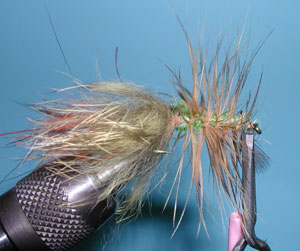
| 10. Pull the thin skin from the paper backing and attach the material with the glossy side down behind the bead chain at the point you created when you trimmed the corners of the thin skin. |
|
|
| 11. Apply dubbing to the thread and wrap the dubbing behind the bead, around the bead, and a few wraps in front of the bead. |
|
|
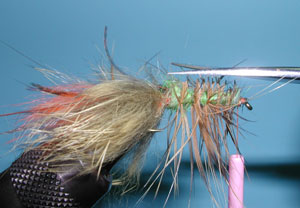
| 12. This should be a healthy amount of dubbing around the bead chain with the thread just at the point of the hook. |
|
|
|
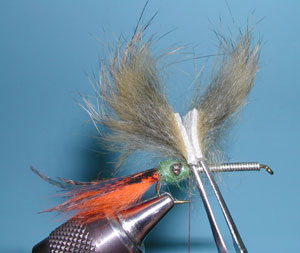
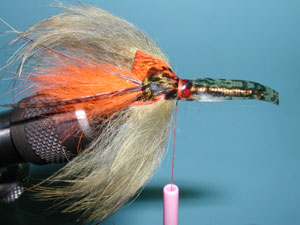
13. Cut a pair of strips which will be the claws. The hide should be twice as long as it is wide. Note how white the hide is. You want to color that with an Orange marker, getting the edges of the hide as well. |
|
|
| 14. Attach the two pieces on each side of the shank just in front of the bead chain. | |
|
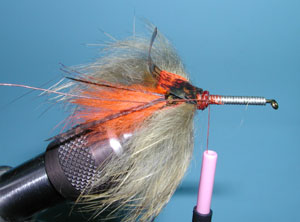
| 15. Now, pull the thin skin over the bead chain and secure with a few thread wraps just in front of the bead. | |
|
| 16. Pull the thin skin back and attach the wire ribbing to the lead wrapped shank. Secure with thread wraps. | |
|
| 17. Attach a brown hackle to the shank just in front of the bead. Try to select a feather that has a good taper. I prefer using Hen Neck Hackle due to it's webbiness and soft qualities. Tim prefers to use a Rooster Saddle due to it's better taper. | |
|
| 18. Next, apply more dubbing with a couple of wraps behind the hackle feather and continuing towards the eye of the hook. | |
|
| 19. Dub to just behind the eye. | |
|
| 20. Attach your hackle pliers to the tip of the hackle and gently palmer the hackle around the dubbed shank 5-6 times. Secure the tag end just behind the eye with some thread wraps. |
|
|
| 21. Give the hackle fibers a little haircut on the top of the shank to lessen the amount of fiber material. This is where the thin skin will be pulled over. |
|
|
| 22. Pull the thin skin over the dubbed body and secure with thread wraps just behind the eye. |
|
|
|
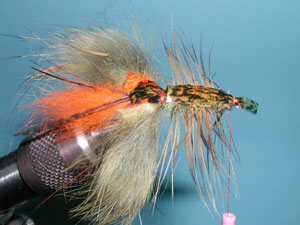
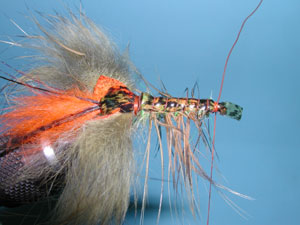
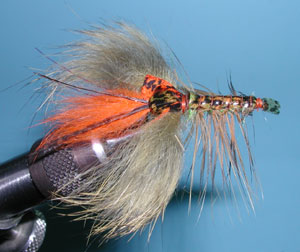
23. Wrap the ribbing wire over the body about 6 times creating equal segments. Secure the wire ribbing just behind the eye and trim off the excess. |
|
|
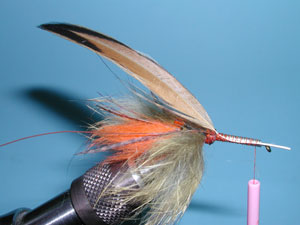
| 24. Whip Finish. Take a Brown Marker the create some marks on the Orange colored hide for a mottled effect. You can also notch the tag end piece of the thin skin for a realistic tail. | |
©2023 Steve Schalla
This page is not to be copied without
my explicit permission.