


|
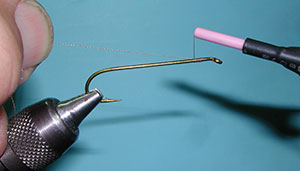
1.Secure a 6X long streamer hook to the vise such as a TMC 300. Attach the thread to the hook shank behind the eye and wrap down to the midpoint of the shank. Note that I lift up the tag end of the thread to direct the thread wraps to touch the previous wrap. This provides a even, smooth, thread foundation. |
|
|
|
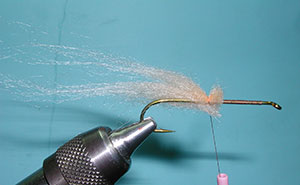
2. Clip off a section of polar fiber and secure the section at the base to the midpoint of the shank. Use one loose wrap and then pull down to bring the material around the shank. |
|
|
|
3. Secure the tag end of the material with tight wraps at the midpoint of the shank. This makes a tail and body for the pattern that flows over the base of the hook. |
|
|
|
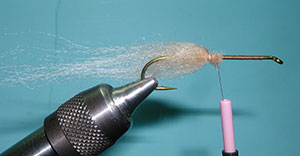
4. Secure painted lead eyes just behind the eye of the hook. By securing the eye to the top of the shank, this will invert the hook so that the point is above the body and less likely to snag bottom. Secure with figure 8 wraps and place 4 tight circular wraps underneath the eyes to draw the figure 8 wraps tightly together. Bring the thread back to the midpoint of the shank. |
|
|
|
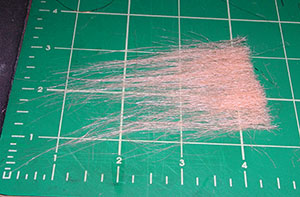
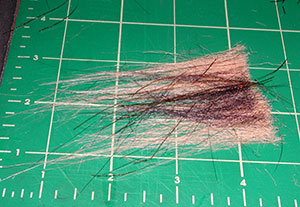
5. Lay down a section of craft hair that is your primary color. In this case, Tan (70%) is spread on the pad with the base edge even. |
|
|
|
6. Lay down a second layer of the secondary color, Black (15%) spread evenly from the base edge. |
|
|
|
7.Next, lay 10-20 strands of flash with the strands parallel to the craft fur. |
|
|
|
8. Finish the layers with a layer of Brown Craft fur (15%) evenly spaced on top. |
|
|
| 9. Create a dubbing loop at the midpoint of the shank. | |
|
|
10. Always bring a wrap of thread around the tip of the thread loop below the hook shank. This is close the loop against the hook shank. |
|
|
|
11. Place the material within the loop with the trimmed edges protruding just beyond the thread. Close the loop with the downward pressure of the loop hook. |
|
|
|
12. Twist the loop by spinning the loop tool. I like to hold the thread above the tool for some control and release the hold to bring the twist up into the material. |
|
|
|
13. Use a dubbing brush to splay out the fibers that get trapped. |
|
|
|
14. Transfer a hackle plier to the thread loop base while removing the loop tool. Use the hackle plier to wrap the dubbed brush over the hook shank. Preen the fibers back with your thumb and finger son that the next wrap does not trap errant fibers. |
|
|
|
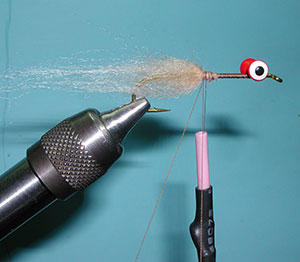
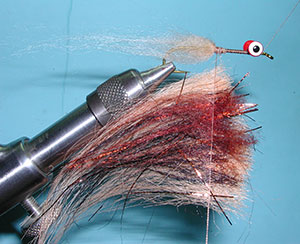
15. Continue wrapping up to the eyes. |
|
|
|
16. Wrap around the eyes and secure just in front of the eyes. If you don't have enough material, that's okay. We can make another loop for the head. |
|
|
|
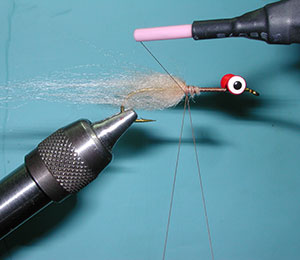
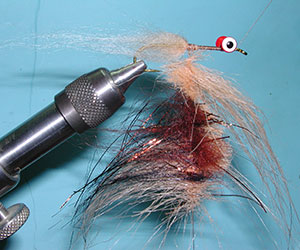
17. Apply the tan craft fur to the loop and spin. You won't need flash. |
|
|
|
18.Wrap the head with some figure 8 wraps and beneath and over the lead eyes finishing in front of the eyes. Secure with a whip finish. |
|
|
|
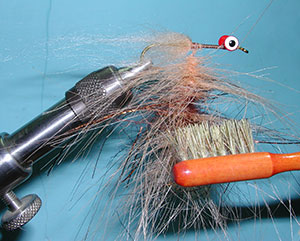
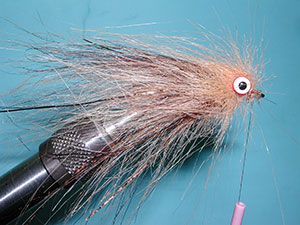
19. Use your dubbing brush to smooth out the fibers and flow down the hook shank. |
|
|
|
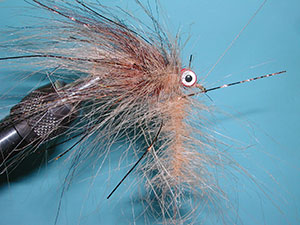
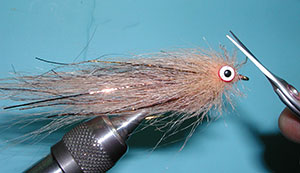
20. Trim off some of the errant fibers. |
|
|
|
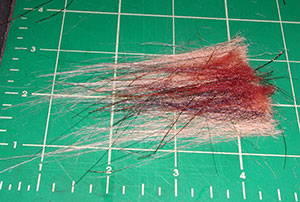
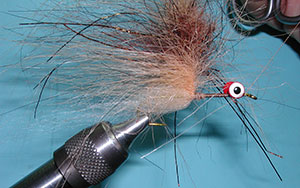
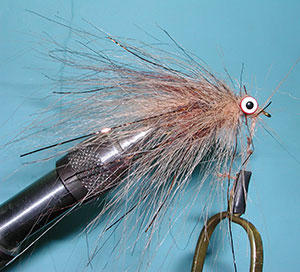
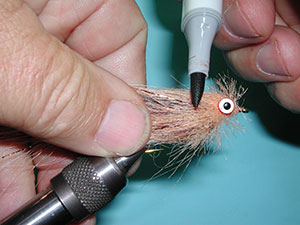
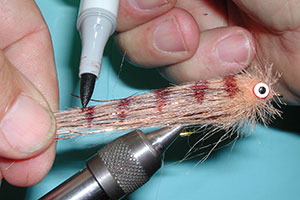
21. Using a Copper copic marker, add banding to the top sides of the fly. It’s best to pull all the hair back tightly and hold it by the tips as you apply the marks. |
|
|
|
22. If using a sharp tipped marker, blot the side of the point against the hair rather than trying to add the mottles with the sharp point. The mottles not only make the fly look more like the natural, but in the water, add to the visual impression of the swimming motion. Allow the marker ink to dry for 24 hours before using the fly. |
|
|
|
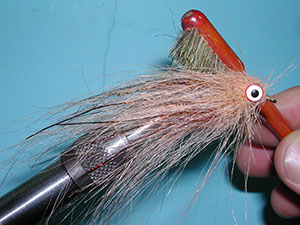
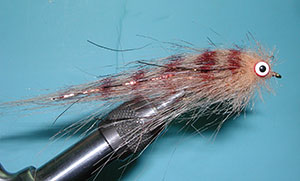
23. The finished Down and Dirty Sculpin designed by Gary Borger. |
|
|
©2023 Steve Schalla
This page is not to be copied without
my explicit permission.