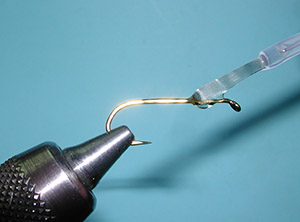


| 1. Attach the hook to the vise and apply some adhesive to the shank. This will anchor the thread to the hook shank.
|
|
|
| 2. Lay down a tight thread foundation from behind the eye to the bend of the hook. |
|
|
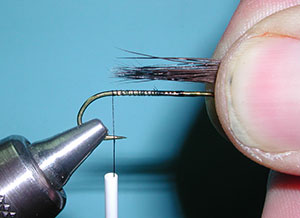
| 3. Clip a bundle of Moose Body Hair, clean off the underfur, and even the tips in a hair stacker. Measure the hair bundle so that it will be about one shank length. Apply another swab of adhesive to the thread foundation to secure the moose hair from rotating. I'm using Sally's Hard as Nails. |
|
|
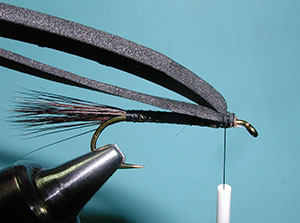
| 4. Attach the Moose Hair at the bend of the hook with a couple of tight wraps and secure the bundle to the top of the hook shank up to an eye length behind the eye. In wrapping, lift up on the bobbin on each wrap to keep the bundle centered on the top of the shank. |
|
|
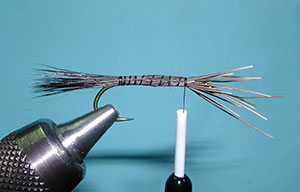
| 5. Cut two foam strips that are equal or slightly wider than the hook gap. One will be the black overbody and will be 1mm thick for sizes 6 to 10. The other one will be 2mm thick and will be the underbody. The underbody layer can be either black or a different color and is thicker of the two. Trim each strip to a point. |
|
|
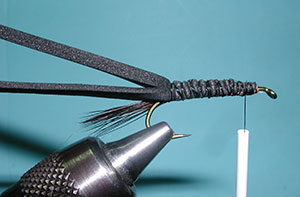
| 6. Matching the foam strips so that the thinner over body is below the thicker underbody, attach the points just behind the hook eye with tight thread wraps. |
|
|
| 7. Anchor the two foam strips to the tops of hook shank with tight wraps to the bend of the hook. Wrap back to the eye. | |
|
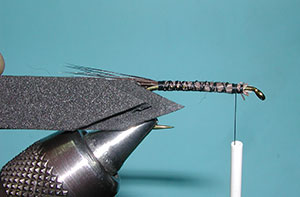
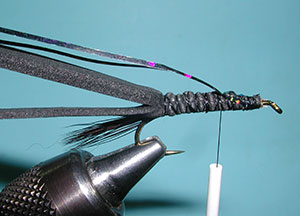
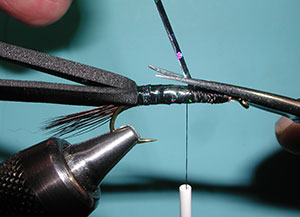
| 8. Tie in two strands of holographic flashabou and secure the flashabou to the top of the body back to the bend of the hook. | |
|
| 9. Return the thread to the midpoint of the shank. | |
|
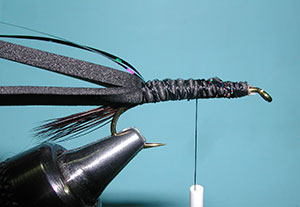
| 10. Tightly wrap the flashabou up to the mid point of the hook and tie off. Trim off the tag end of the flashabou. | |
|
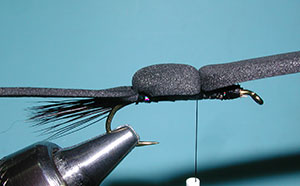
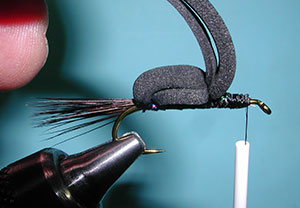
| 11. Pull your underbody foam forward and secure with two tight wraps at the mid point of hook. | |
|
| 12. Put a tiny drop of Foam Zap on the top of the underbody. You can also use Sally's. | |
|
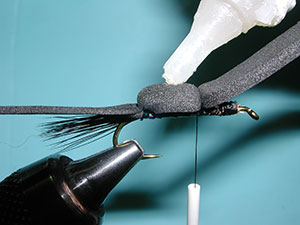
| 13. Then pull the overbody forward and secure with two more tight thread wraps.. | |
|
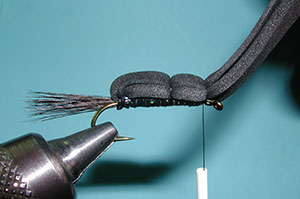
| 14. Advance the thread to just behind the eye. An eye length behind the eye is good. | |
|
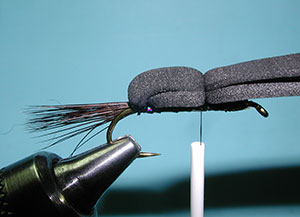
| 15. Apply a few tight thread wraps securing the foam strips behind the eye.. | |
|
| 16. Then apply more thread wraps to compress the thorax region of the foam. | |
|
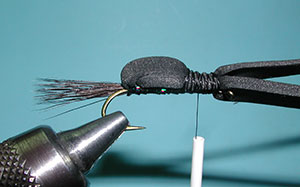
| 17. Tie in poly yarn wing on top of the thorax region | |
|
| 18. Tie in hackle at the base of the thorax region. | |
|
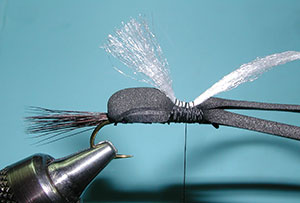
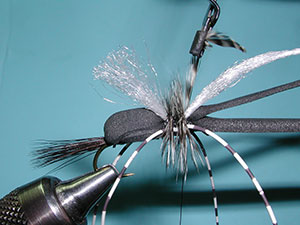
| 19. Attach two sets of legs to the top of the thorax region with a thread wrap and position each set so that they lie along the side. Apply additional thread wraps to secure the legs along the side of the thorax. Densely wrap your hackle forward and tie off. | |
|
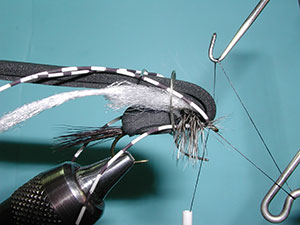
| 20. Carefully pull the foam head and wing out of the way and tie off your thread at the eye of the hook. I'm using a piece of leadfree wire to hold the material back for the photo. Another way is to readjust the hook in the vise so that the eye is upwards and the material drops behind it. Whip Finish and apply Head cement. | |
|
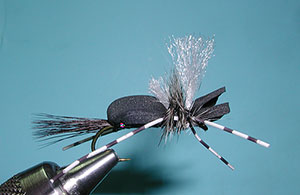
| 21. Finished Hippie Stomper | |
©2023 Steve Schalla
This page is not to be copied without
my explicit permission.