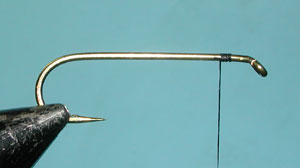
| 1. Attach the thread about an eyelength behind the eye. |
|
|
| 2. Attach a piece of Silver Tinsel to the hook shank just behind the eye. |
|
|
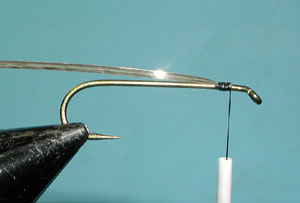
| 3. Wrap the tinsel back toward the bend of the hook, stopping just above the point of the hook. Sprial wraps should just touch each other. |
|
|
|
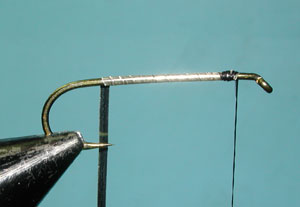
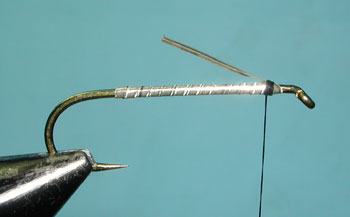
4. Now, spiral wrap forward, again with the edges of the tinsel just touching each other. Wrap up to just behind the thread. |
|
|
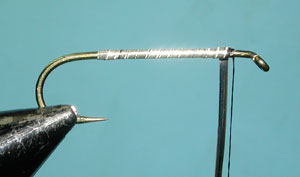
| 5. Apply two wraps of thread just behind the tag end of the tinsel to hold in place. Then, bring the tinsel around the shank once more and pull the tag towards the rear. Secure the tinsel with 2-3 more thread wraps. Clip off the tag end. | |
|
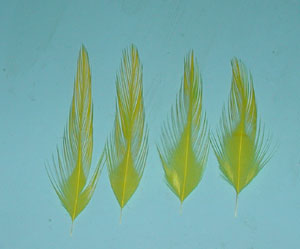
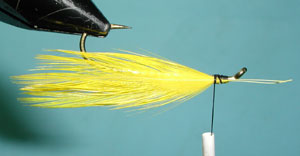
| 6. Select 4 yellow saddle hackles. The length of the hackles should be about one hook gap beyond the bend of the hook when attached just behind the eye. Clean the barbs from the quill that extend beyond the necessary length. | |
|
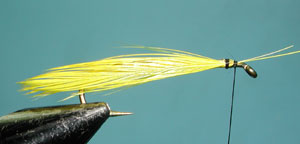
| 7. Take a pair of the prepared quills and flatten the quill where it will be tied with a smooth surface hemostat or pliers. This will help attach the quills to the shank so that the feathers stay in line with the hook shank. Attach the quills just behind the eye with 2-3 thread wraps. Leave at least two eyelengths of space between the hackle and the eye. | |
|
| 8. Pull the tag ends of the quill back towards the read and secure with two more wraps. |
|
|
| 9. Attach the second pair of yellow hackles in the same manner to the other side. I'm using a rotary vise so I find it easier to turn the fly upside down for positioning. Clip off the tag ends of the hackles once secured. |
|
|
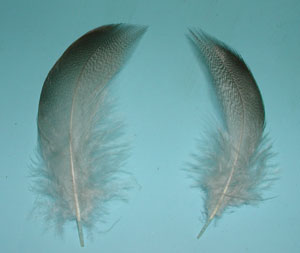
| 10. Select two large Mallard Flank feathers. Often these are sold in pairs. |
|
|
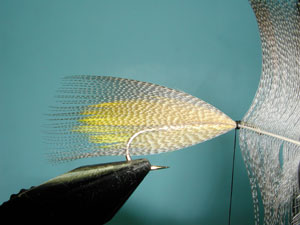
| 11. Position one of the Mallard feathers against the side of the shank for length adjustment. The length should extend from the behind the eye to just beyond the end of the yellow hackle. Mark this position by sweeping the barbs back from the measured point. |
|
|
| 12. With the length established and marked by the sweeping barbs, match the two feathers together and remove those barbs that are swept back, exposing the quill. Flatten these quills with smooth surfaced hemostats to assist in placing the quills against the hook shank. | |
|
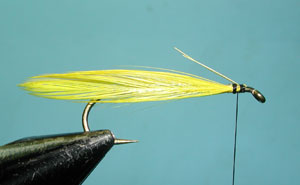
| 13. Now, attach the feather against the side of the shank securing the quill with 2-3 thight thread wraps. | |
|
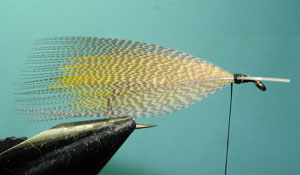
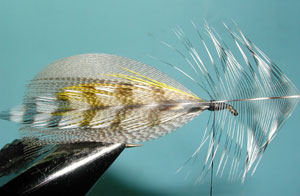
| 14. Repeat this step with the other quill. Note how these feathers envelope the yellow hackles. | |
|
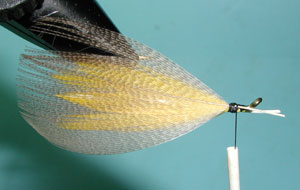
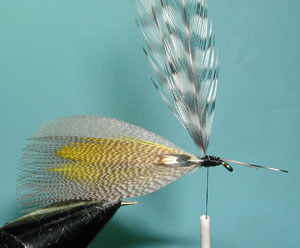
| 15. Pull the tag ends of the quills back towards the rear and secure with and additional 2-3 thread wraps. Trim off the tag ends. |
|
|
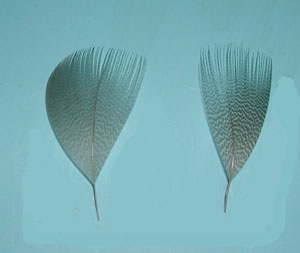
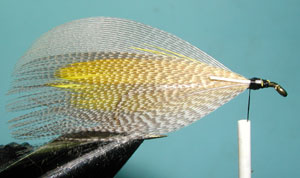
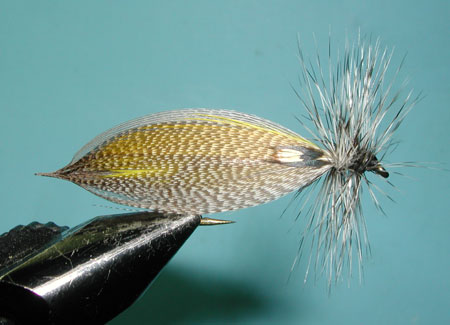
| 16. Jungle Cock is expensive. They do sell imitations made of painted black hackle tips. The main idea is that you want a cheek material that gives the illusion of eyes. A Grizzly Hackle tip or piece of mylar is sometimes substituted. Here, I've selected two jungle cock eyes and have attached them to each side of the shank. |
|
|
| 17. Select two Grizzly hackles. These should be sized for twice the hook gap in barb length. |
|
|
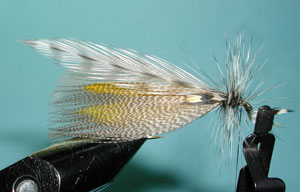
| 18. Prepare the two hackles by removing the webbed barbs and exposing the bare quill. Attach the pair of hackles to the top of the hook shank just in front of the wing. The dull side of the hackles should be facing you. Lift up the hackles to crease the quill. This will help keep the hackles from twisting on the initial wrap. |
|
|
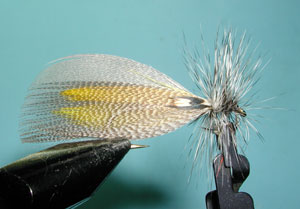
| 19. Wrap the first hackle forward with each wrap just in front of the other. Take care not to trap any of the barbs. Secure the hackle with 2-3 thread wraps just behind the eye and trim off the tag end. | |
|
| 20. Do the same with the second hackle, working the hackle through the first one and securing the tag end with 2-3 wraps, clipping off the excess. | |
|
| 21. Create a small thread head just behind the eye and whip finish. Apply some head cement to the head. Also apply some head cement to the end of the Mallard Flank feathers. Twist the fibers into a point. This is a Western touch that was not in the original. It helps to keep the material together and gives a streamlined sillouette. | |
©2023 Steve Schalla
This page is not to be copied without
my explicit permission.