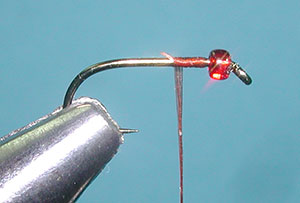


| 1. Slide a glass bead onto the hook. With the PMD, a red, brown, or amber color should work well. Attach the hook to the vise and attach the thread behind the bead.
|
|
|
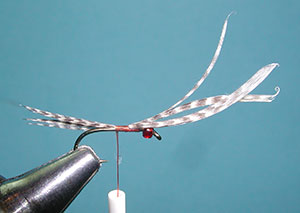
| 2. Select a section of Mallard Flank for the tailing material. Keep the tips even. Place the section of fibers on the top of the hook shank so that the tailing fibers extending beyond the bend of the hook is about 3/4 of the shank length. Secure with a few touching wraps. |
|
|
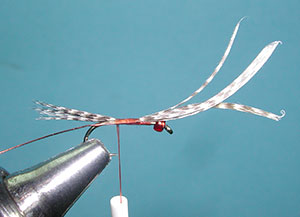
| 3. Next, attach a wire ribbing to the side of the hook shank with a few more touching wraps. Then secure both the taiiling fibers and the wire ribbing with thread wraps to the bend of the hook. |
|
|
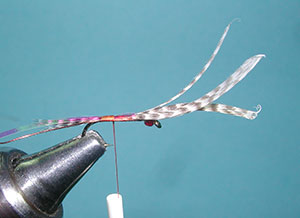
| 4. Place a strip of Pearlescent tinsel to the top of the hook shank and secure at the bend of the hook and up to behind the bead. |
|
|
| 5. Bring the tag end of the tinsel over the top of the hook shank and secure the tag end just behind the bead. This is your flashback. |
|
|
| 6. Wrap the wire ribbing forward with evenly spaced spirol wraps to behind the bead and secure the tag end of the wire with thread wraps. |
|
|
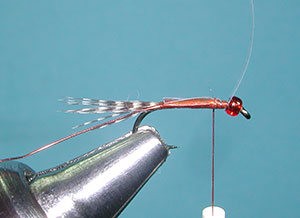
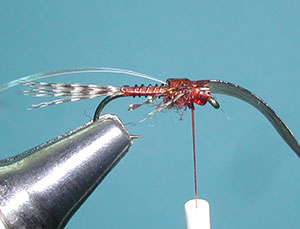
| 7. "Helicopter" the tag end of the wire for removal. It should break cleanly behind the bead. Next, attach another strand of Pearlescent tinsel to the top of the hook shank behind the bead. (Yes...you could have used the tag end of the flashback!) | |
|
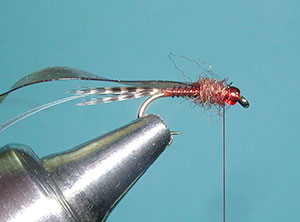
| 8. Secure a strand of scudback behind the bead for a wingcase. Secure the wcudback with thread wraps that will also establish the length of the thorax. You want this to be just less than 1/2 the hook shank length from behind the eye of the hook. | |
|
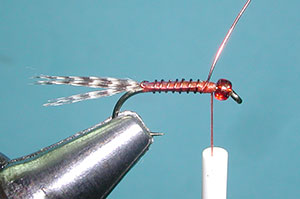
| 9. Apply dubbing to the thread and lock in the first fibers to the hook shank with a first wrap.. | |
|
| 10. Twist the dubbing on the thread creating a tighter rope and wrap a thorax that is about the same diameter as the bead. | |
|
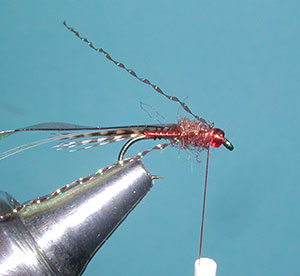
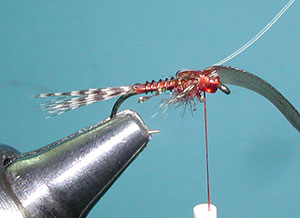
| 11. Attach a strand of midge flash behind the bead at the top of the shank. | |
|
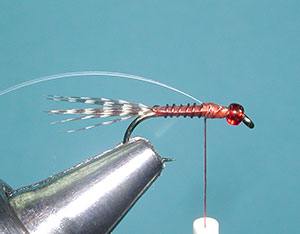
| 12. Next, attach a section of Mallard Flank to the far side of the shank behind the bead with 1-2 loose wraps and adjust the length of the flank tips so that the just extend beyond the thorax. Tighten the thread wraps. | |
|
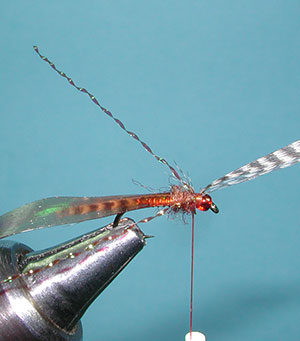
| 13. Now, do the same thing to the side facing you. | |
|
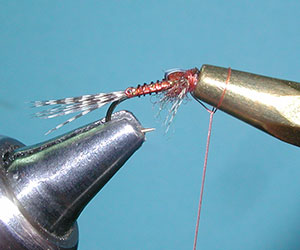
| 14. Bring the scudback over the thorax and secure with a couple of tight wraps and also one more wrap between the tag end of the scudback and the bead. This will really anchor the material. Trim the midge flash to about the same length as the mallard flank tips. | |
|
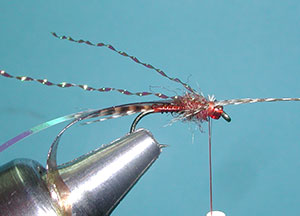
| 15. Bring the tinsel over the top of the scudback and secure with some thread wraps. | |
|
| 16. Apply a couple of half hitches to secure the thread and trim off. | |
|
| 17. Apply a drop of UV Fly Finish thick to the top of the wingcase. Use a bodkin to distribute the drop over the wingcase to the edge of the bead. | |
|
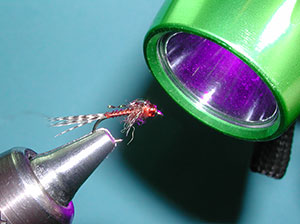
| 18. A UV lamp is necessary to cure the epoxy material. 10-15 seconds is all it takes. | |
|
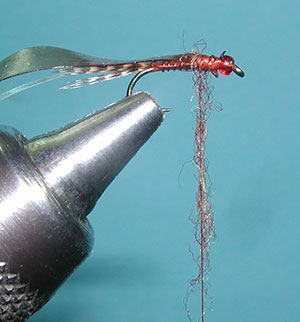
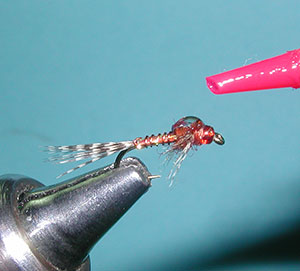
| 19. The finished Military Mayfly, PMD | |
|
©2023 Steve Schalla
This page is not to be copied without
my explicit permission.