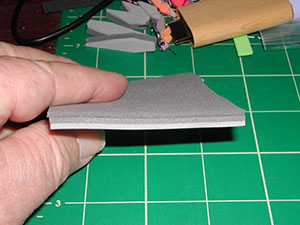


| 1. The Morrish Hopper starts with 3 glued layers of 2 mm foam. The top two layers are one color and the bottom layer is usually a lighter complimentary color to represent the belly of the hopper. Use an adhesive spray, such as Super 77, to coat one side of all the layers. Stack the foam together to form a 6mm block of foam. Popular colorations are Tan/Yellow, Olive/Chartreuse, Tan/Pink, Cocoa/Purple. I am using Dark Gray/Light Gray. |
|
|
| 2. Most of the work with the Morrish Hopper is in the creation of the foam body. It's basically a diamond shape where a size 10 is 1/4" wide and 1.25" long, a size 12 is 3/16" wide and 1" long, and a size 8 is 5/16" wide and 1.5" long. Using a foam cutter makes this initial shape accurate and perfect every time. River Creations has Morrish Cutters in sizes 6-12. Each cutter has a corresponding cutter for the indicator foam as well. |
|
|
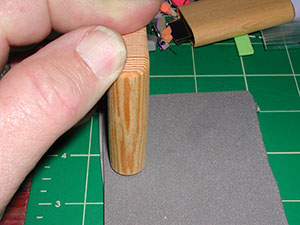
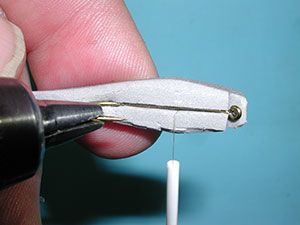
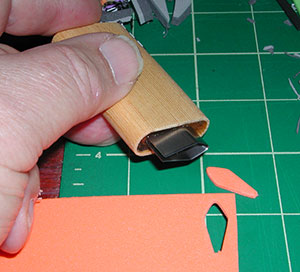
| 3. Firmly place the cutter on the foam block and apply downward pressure straight down until you can feel the cutter cut through all of the foam and reach the cutting mat below. |
|
|
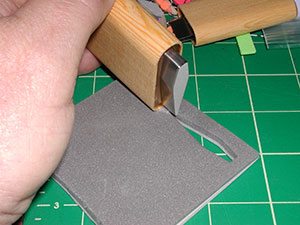
| 4. Lift the cutter and you should see the foam body within the cutter if it has been uniformly cut throughout the foam block. The tail section has a slight opening in which the foam might still be attached to the block. Pull the cutter from the block forcefully separating the foam body from the block. The opening of the cutter provides a means to extract the body from the cutter. |
|
|
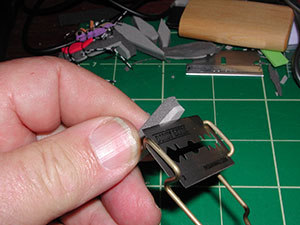
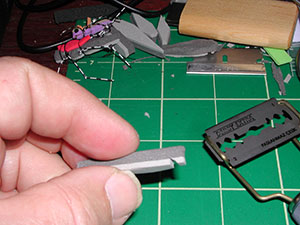
| 5. The first step in tranforming the body is to cut a notch about 2 eye lengths behind the head. This notch defines the rear of the head and is where the eye of the hook will be positioned. Cut out notch on the bottom, lighter colored belly of the hopper with a double-edged blade. the initial cut is perpendicular to the foam and cuts just through the lighter colored layer, 2mm deep. |
|
|
| 6. The second cut is a diagonal cut meeting the perpendicular cut just at the bottom of the second layer. |
|
|
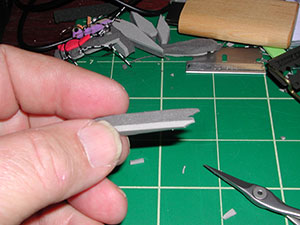
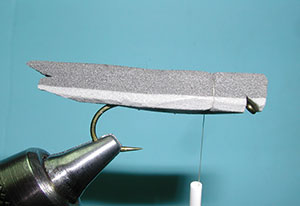
| 7. Use your scissors to trim the tail profile you desire. Basically, the top layer of foam should extend beyond the other two layers as a wing sillouette and the middle two layers are notched to define the rear of the body. The bottom layer is trimmed with a slant cut to create a tapered body. |
|
|
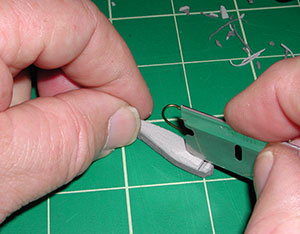
| 8. All of hard edges are softly trimmed with a pair of sharp razor scissors. The last cut is a razor cut up the center of the bottom layer. This will provide a channel to adhere the foam to the hook shank. |
|
|
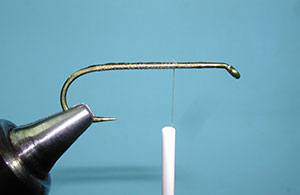
| 9. Apply a thread foundation to the hook shank from the eye of the hook to the bend. Wrap the thread back to just beyond the midpoint toward the eye. |
|
|
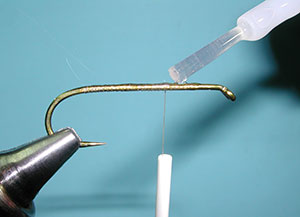
| 10. Apply a generous amount of Super Glue or Zap a Gap to the hook shank. |
|
|
| 11. Attach the hopper body to the hook shank with the eye of the hook within the head notch. After a few minutes, test the adhesion. If it still slips, apply some more Zap a Gap into the channel with the microdropper applicator that comes with the bottle. |
|
|
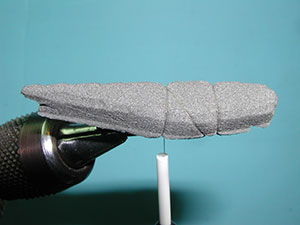
| 12. Place two wraps loosely around the foam body and tighten just a little. This is the location where the forward legs will be positioned. You do not want to create a deep groove into the foam as a deep groove will splay out your rubber legs in an unnatural direction once they are set into this section. |
|
|
| 13. Bring the thread over the top and to a rear position behind the first wraps. This position is behind the largest width of the body. Place two wraps like you did before to define the placement of the rear legs. Notice that the greatest width of the body should be centered between these two leg placement positions. |
|
|
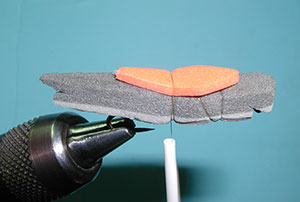
| 14. Now take your indicator cutter and create an indicator that is similar in shape as the body but much smaller. Use a color that is easy to see like orange or red on 2mm foam. |
|
|
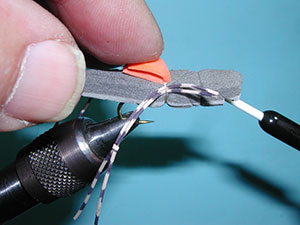
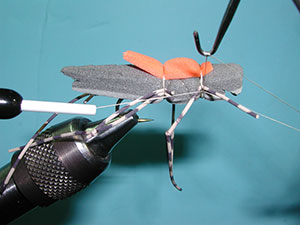
| 15. Place the indicator piece so that it's widest section is directly above the widest section of the body. Apply two thread wraps over the indicator strip where the rear legs will be positioned. |
|
|
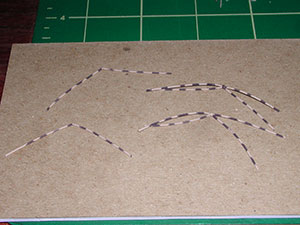
| 16. Clip six strands of rubber leg material that are at least 2.5 inches long. You need two sets of rear legs that are double strands and 2 sets of front legs that are single strand. Knot each of the legs in the middle and apply Zap a Gap to the knot of each leg. |
|
|
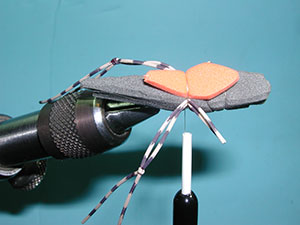
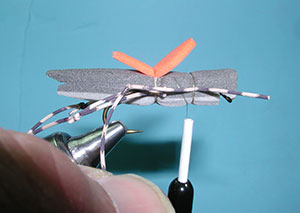
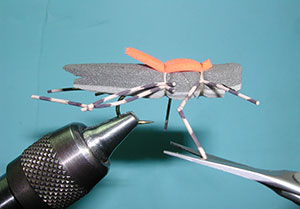
| 17. Attach the two sets of rear legs with two more thread wraps, firm but not too tight. Position the legs so the that knots reach just short of the end of the body. Apply about 8-10 more additional wraps. |
|
|
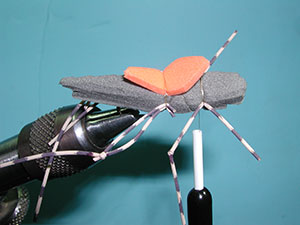
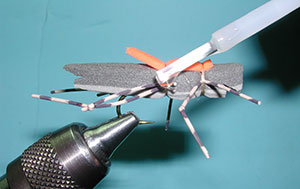
| 18. Fold back the front portion of the indicator piece and wrap the thread forward across the top of the body to the front wraps. |
|
|
| 19. Trim the tag ends of the Rear legs near the tie in position and trim off one of the legs behind the knot.
|
|
|
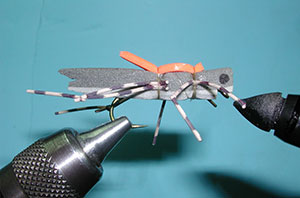
| 20. Attach the two sets of front legs with the knot of each leg halfway between the rear leg knot and the rear leg tie in position. Apply two thread wraps firmly but not too tight. |
|
|
| 21. Once the legs are in position, apply 8-10 wraps. |
|
|
| 22. Apply two firm wraps to secure the indicator piece to the top front of the hopper body. |
|
|
| 23. Whip Finish over the indicator and front leg tie in location. |
|
|
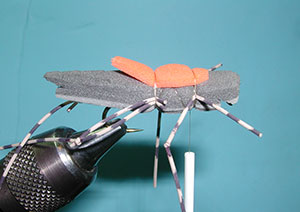
| 24. Trim legs as shown. | |
|
| 25. Apply Zap a Gap to each of the four leg tie in positions. |
|
|
| 26. Add eyes with a black marker. |
|
|
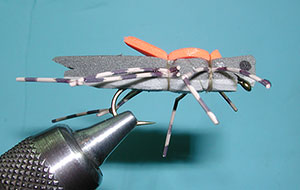
| 27. The finished Morrish Hopper. |
|
|
©2023 Steve Schalla
This page is not to be copied without
my explicit permission.