About 3 turns is all you need for a fully dressed parachute hackle. This is provide adequate floatation for the pattern. On the last turn bring the hackles over the eye of the hook with the quills against the shank.
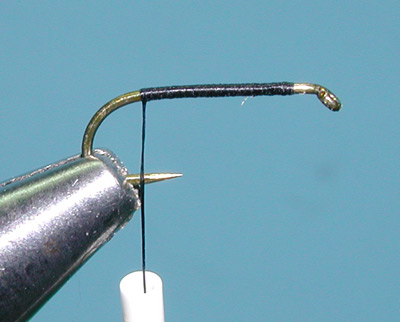
| 1. Secure the TMC 100 or any light wire 1X Dry fly hook to the vise. Debarb the hook by pressing down on the barb with your hemostats. The Parachute Adams can be tied with either Black or Gray thread. I am using 6/0 Danville for a size 16 but will use 8/0 for sizes 18 and smaller. Attach the thread behind the eye and lay a thread base to the bend of the hook. This thread base will help keep the material from shifting on the shank. |
|
|
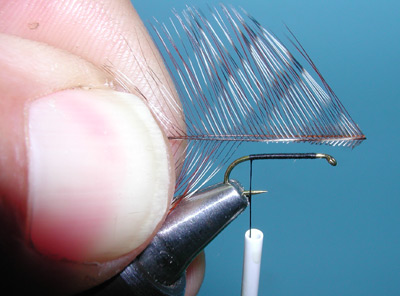
| 2. Select two tailing hackles, one a grizzly and the other a brown. Tailing hackles, also known as Spade hackles, come from the edges of your cape. The fibers are stiffer and glassy. Massage the fibers back along the quill stem to ascertain length and clip those you want for the tail. You want about 15-20 fibers for the tailing material. |
|
|
| 3. Match up the tailing tips the best you can. I like to use a small hair stacker to even the tips. The tail should be about the same length as the shank. |
|
|
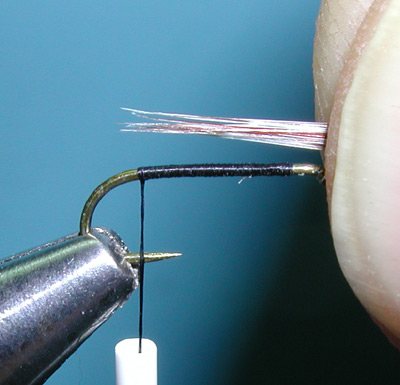
| 4. Secure the fibers to the top of the hook shank with thread wraps. | |
|
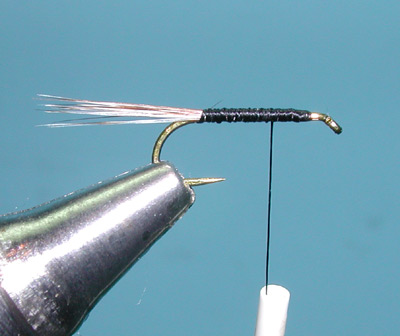
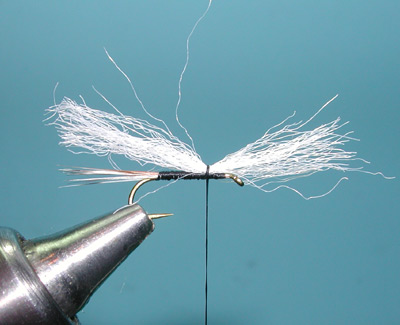
| 5. Cut a 1" strand of Polypropylene floating yarn. Using about a quarter of the strand, this should be about the number of fibers you need for a wingpost. Attach the fibers at the 60-70% position of the shank. This would be a position that is midway between the eye and the point of the hook. | |
|
| 6. Apply some cross wraps that will separate the fiber bundles like a spinner wing. This will give the post a good base support off the shank. |
|
|
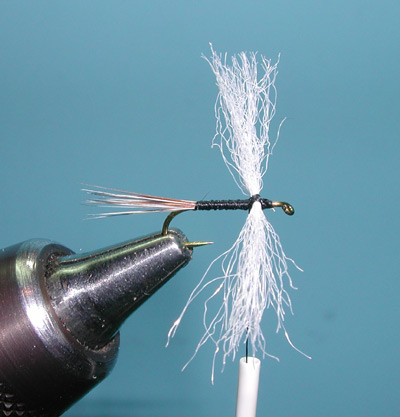
| 7. Bring the fibers together and create a wingpost base with thread wraps. I find that rotating the wingpost towards me allows for better thread control for my wrapping. You can use your other hand to hold the wing material to help stiffen the post for wrapping. Take a couple of wraps around the shank to secure the post wraps. |
|
|
| 8. Bring the fly upright on the vise again. You can apply a few more wraps to support the base. The base support should be about 1mm tall, just tall enough to handle 6-8 turns of hackle. |
|
|
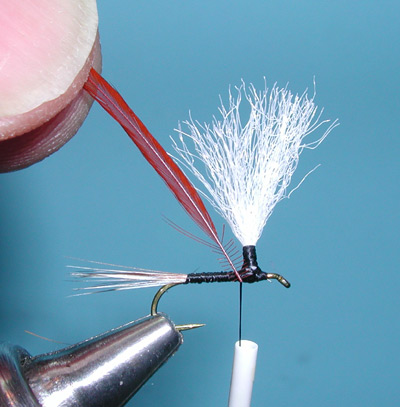
| 9. Prepare two hackles, one a Grizzly and the other a Brown sized for the hook. The base fibers are cut near the quill creating some nubs that assist in securing the hackle to the wingpost. | |
|
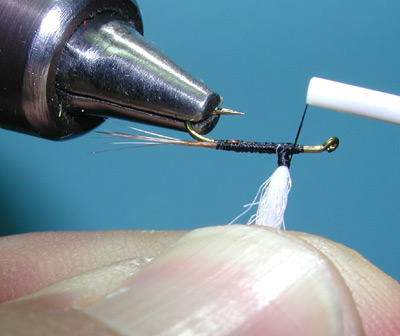
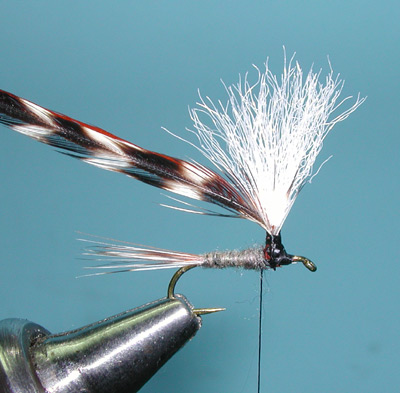
| 10. Secure the the first hackle to the hook shank below the wingpost with the glossy side of the hackle facing the wingpost material. Secure the hackle quill to the wingpost up to the top of the threaded base. | |
|
| 11. Attach the second hackle in the same manner as the first with both hackles secured in the same position alongside the wingpost. You will be wrapping both hackles simultaneously so you need a stout wingpost base. |
|
|
|
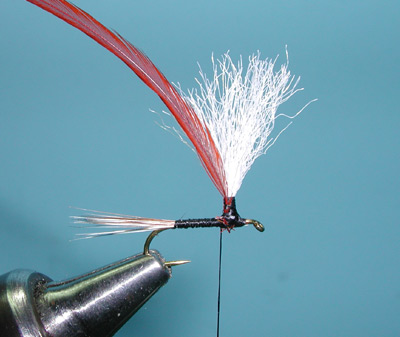
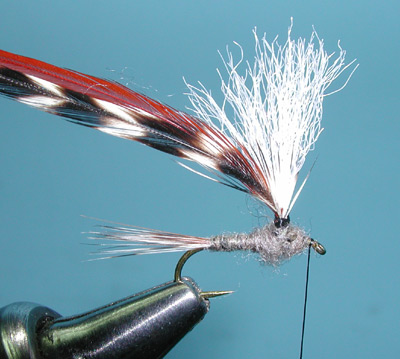
12.Now is a good time to apply some dubbing to the abdomen. Bring the thread close to the tail tie-in position and apply the Superfine dubbing to the thread. |
|
|
| 13. Wrap the dubbing forward to the base of the wingpost creating a tapered abdomen. | |
|
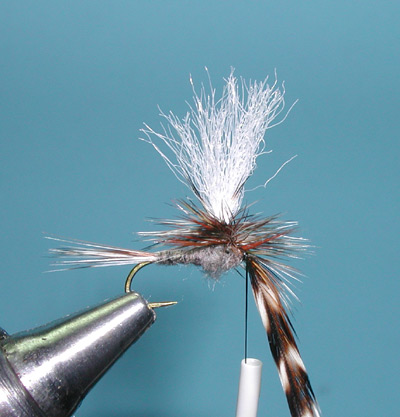
| 14.Next, wrap a small thorax with some criss cross wraps around the wingpost and a couple of wraps in front of the wingpost. Leave a space behind the eye of the hook to secure the hackle once you completed the wrapping. |
|
|
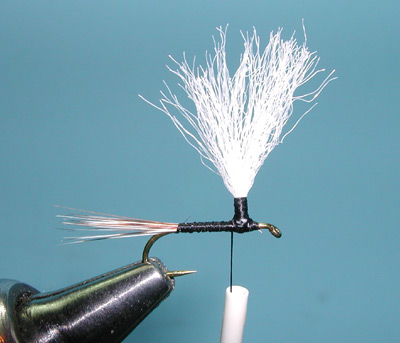
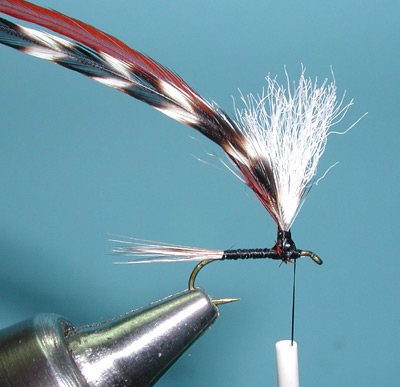
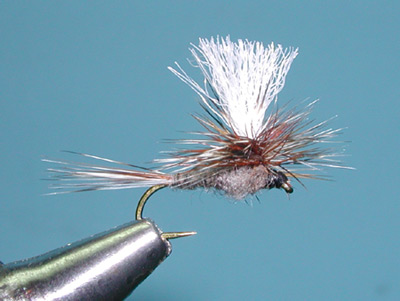
| 15. You can wrap the hackles either one at a time or together as long as you have control over their placement around the hook shank. I am wrapping the two hackles together starting the wraps near the top of the wingpost base and wrapping successive wraps underneath the previous one. About 3 turns is all you need for a fully dressed parachute hackle. This is provide adequate floatation for the pattern. On the last turn bring the hackles over the eye of the hook with the quills against the shank. |
|
|
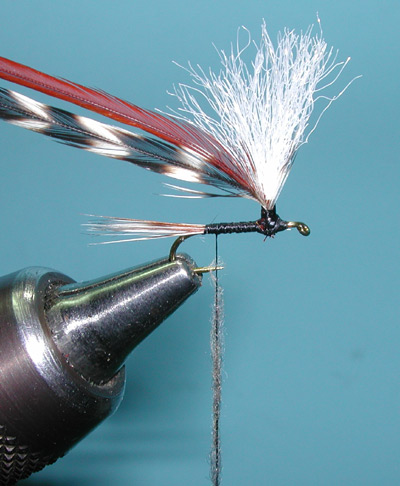
| 16 .I like to turn the fly in the vise with the bottom of the fly facing me. The hackles are secured to the side of the shank just behind the eye. Apply two wraps to secure the hackles and trim off the hackle tag ends. Bring your fly upright in the vise again and lift the hackles in front of the eye wrapping the thread to create a head and secure the tag ends of the hackles. I apply a few half hitches to secure the thread and then use a Whip Finish. |
|
|
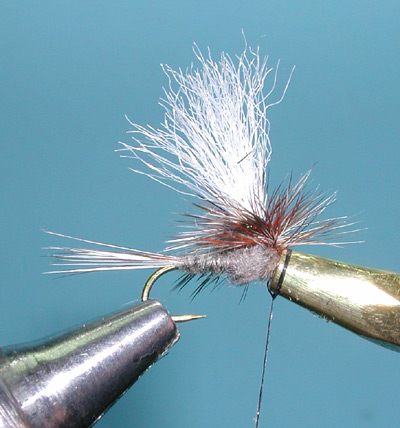
| 17. A little head cement to the head offers additional support against unraveled thread. Trim off any errant fibers and you are ready to go. Some will trim the wing into a Mayfly wing silhouette. Note the proportions of the fly. The wingpost is trimmed to about the same length as the hook shank and the tail. The parachute hackle fibers just reach the base of the tail and are firmly wrapped at the bottom of the wingpost. |
|
©2023 Steve Schalla
This page is not to be copied without
my explicit permission.