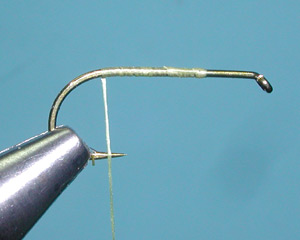

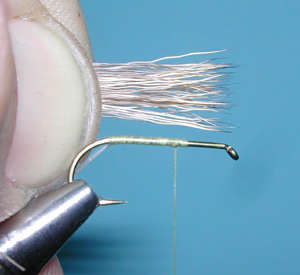


| 1. Attach the hook to the vise. Start the thread at the 1/3 position of the hook shank and lay a thread foundation to the bend of the hook. |
|
|
| 2. Attach a piece on 15 lb. monofilament to the top of the hook shank and secure from the midpoint of the shank to the bend of the hook. The monofilament will act as a support for the extended body that will be built. |
|
|
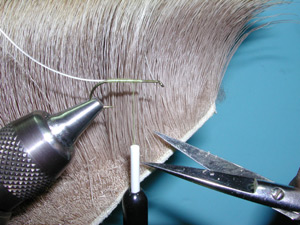
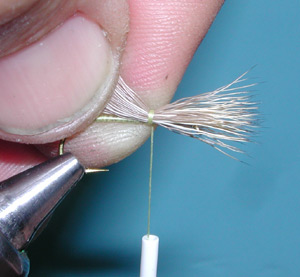
| 3. The next step is to create a wingpost. Clip a section of Natural Elk Hairs from the hide. Choose a hide with fairly straight, dun colored hairs. |
|
|
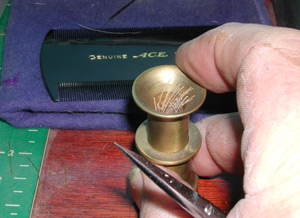
| 4. Use a comb to clean the underfur from the hair clump. |
|
|
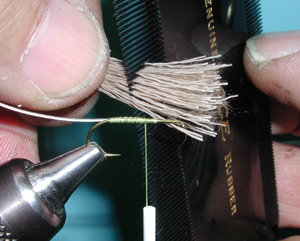
| 5. Place the hairs within a stacker and tamp the stacker to even the tips. | |
|
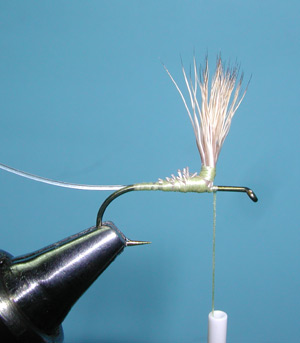
| 6. Measure the length of the wingpost to be about one hook shank length. The clump will be attached at the 1/3 position of the shank with the hair over the top of the eye. |
|
|
| 7.With 2-3 tight turns of the thread over the clump of Elk Hair, keep the hair from spreading or rotating around the hook shank by applying thread tension only in a up and down direction. Once the clump is secure, lift up on the tag end of the hair in preparation to cutting the tags at an angle. |
|
|
| 8. The tags ends will behind the initial wraps and can be secured with further thread wraps. Hold the clump in place to keep it from rotating around the shank. |
|
|
| 9. Apply tight wraps to the tag end of the Elk Hair with a tapered profile. The pivot point of the wingpost should be at the 1/3 position of the hook shank. |
|
|
| 10. Lift up the hair tips and secure with a couple of tight thread wraps up against the base. This will help keep the hairs in a vertical orientation. |
|
|
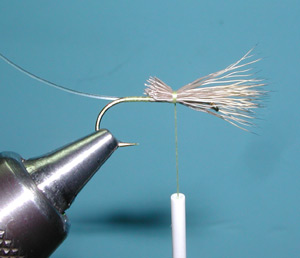
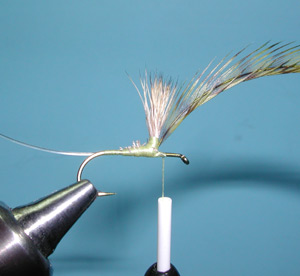
| 11. Wrap the thread around the base of the wingpost bringing the thread up the base about an eighth of an inch. The thread base will be a good anchor platform for your hackle and it keeps the hairs within a tight clump as a wingpost. |
|
|
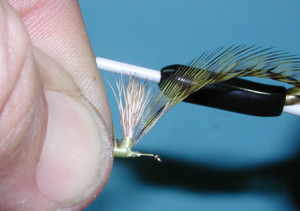
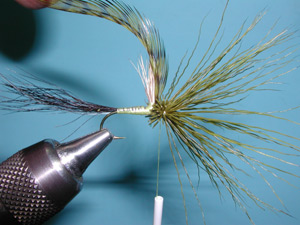
| 12. Pull off the bottom fibers of the the hackle to expose only the quill stem. It is the quill stem of the hackle that gets secured to the wingpost. Place the stem up against the hook shank just in front of the wingpost and secure with two wraps over the hook shank. The hackle should have the concave side facing out. Next, apply 2-3 thread wraps around the wingpost and the hackle stem going up the threaded wingpost and then 2-3 going down the threaded wingpost. Finish your thread wraps just in front of the wingpost further securing the hackle stem on the shank.. |
|
|
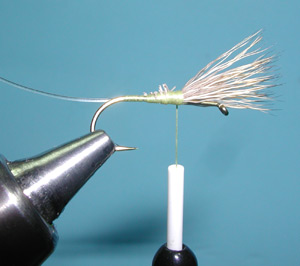
| 13. Wrap the thread to the bend of the hook. Clip a number of hairs from a hide of Moose Body Hair. Don't clip too many. |
|
|
| 14. Comb out the underfur and even the tips within a hair stacker. | |
|
| 15. Measure the length of the moose hair so that it is about two shank lengths long and clip off the tag ends at this point.. |
|
|
| 16.Place the butt ends of the moose hair just behind the wingpost and secure with a couple of tight wraps keeping the material at the top of the shank. |
|
|
| 17. Secure the moose hair back along the shank to just in front of the bend of the hook. The bobbin thread should be just on the hook point. |
|
|
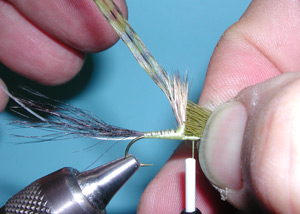
| 18. Clip a section of Olive dyed Elk Hair that is about a pencil thickness in diameter. Clean the underfur from the hair with a comb and even the tips in a stacker. Measure the hair to be about two shank lengths long and cut the tag ends off at this point.. |
|
|
| 19. Bring the butt ends of the body hair to just in front of the wingpost. |
|
|
| 20. Apply two wraps losely around the butt ends, then tighten with another wrap. The hair will spin around the shank uniformly distributing the hair. Apply 4-5 additional wraps around the butts to secure and make sure that you have some tight wraps just behind the eye of the hook so that the bullethead starts just behind the eye. |
|
|
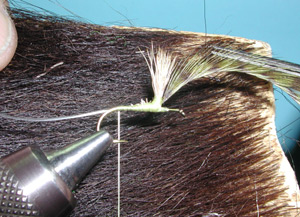
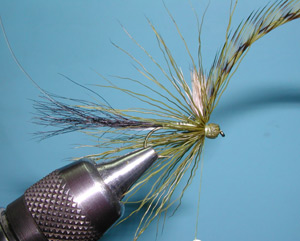
| 21. Take your finger and push back on the hairs until your finger rests firmly on the eye of the hook. Using a Half Hitch Tool, select the tool with a wide enough opening to enclose the hook eye and push the hairs up against the wingpost. Secure with two tight wraps of thread just in front of the half hitch tool. |
|
|
| 22. Pulling off the Half Hitch tool you should see a nice bullethead with the hair tips slayed behind it. |
|
|
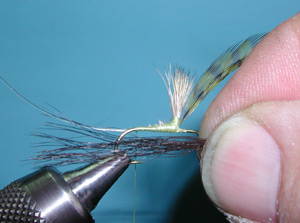
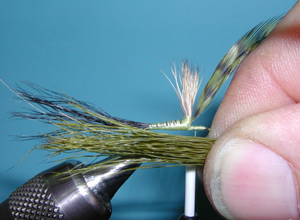
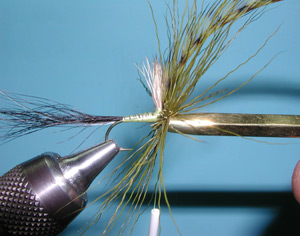
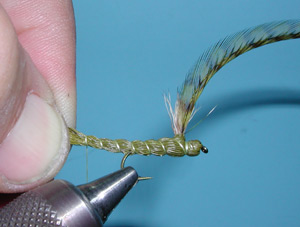
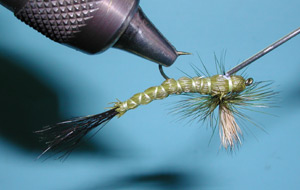
| 23. Groom the hair tips back over the hook shank and apply evenly spaced spirol wraps as you proceed to the bend of the hook. Maintain thread tension at all times. |
|
|
| 24. Position the bobbin onto the other side of the hook bend and continue spirol wraps onto Elk Hair so that the extended body is about another half of a shank length. Apply a second thread wrap at this location. | |
|
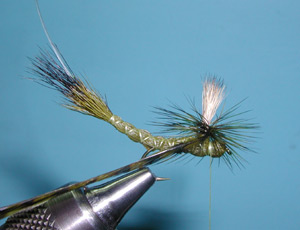
| 25. Wrap the thread forward with evenly spaced spirol wraps up to the base of the wingpost. |
|
|
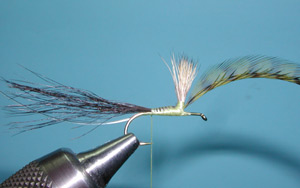
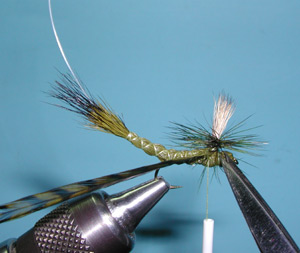
| 26.Wrap the hackle from the top of the post down to the base. The number of turns is subjective. You probably want some additional turns in faster moving water. |
|
|
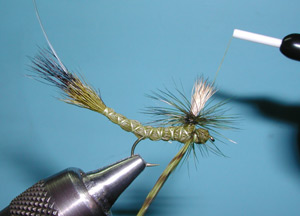
| 27. Secure the parachute hackle in front of the wing post with a couple of tight thread wraps. |
|
|
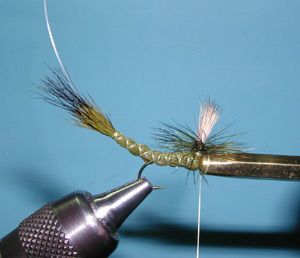
| 28. Then rotate the fly towards you with the parachute hackle in a vertical direction. Apply some counter-clockwise wraps around the base of the wingpost, locking the hackle quill to the wingpost base. |
|
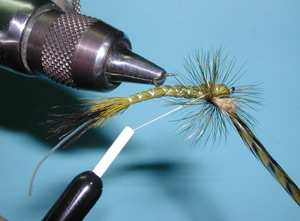
29. Snip off the remaining hackle just in front of the wingpost. |
|
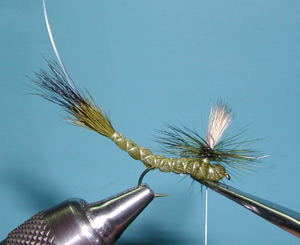
| 30. Apply two half hitches just in front of the wingpost. |
|
|
| 31. Snip off the bobbin thread at the base of the head. |
|
|
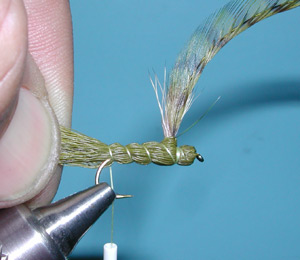
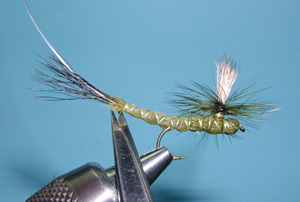
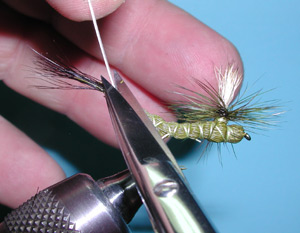
| 32. Next, snip off the tips of the Elk Hair from the extended body leaving a small amount of material just in front of the last thread wraps. Take care not to cut any of the Moose Hair. | |
|
| 33.Clip off the monofilament just at the base of the tail next to the end of the extended body. |
|
|
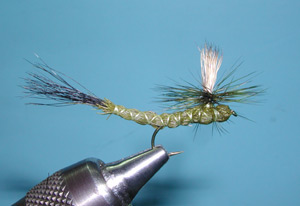
| 34. Apply a drop of head cement to the finished half hitched thread wraps. |
|
|
| 35. The finished Paradrake. |
|
©2023 Steve Schalla
This page is not to be copied without
my explicit permission.