


|
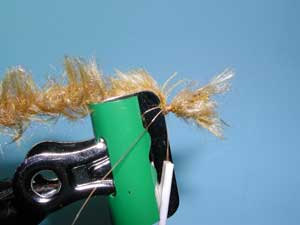
1.Clip a piece of EZ Bug yarn about 2.5" long. Peel back the fibers on 1/2 inch of one tag and expose the thread core. Wrap 6-10 wraps of thread around the core to keep it from unraveling. |
|
|
|
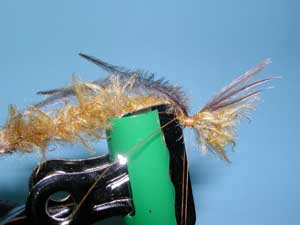
2. Attach three ostrich herls with the tips even on top of the yar with the tips extending over the tie-down location. The length of the tails should be the same length as the abdomen. Secure the tails with 6-10 thread wraps. Clip off the Ostrich butts. Trim the longer fibers of the yarn so that a shaved core exists. |
|
|
|
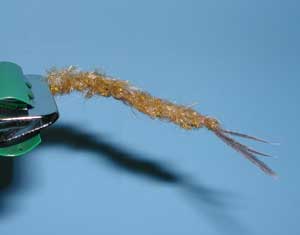
3. Clip off the Ostrich butts. Trim the longer fibers of the yarn so that a shaved core exists. |
|
|
|
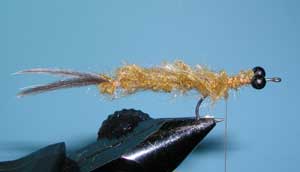
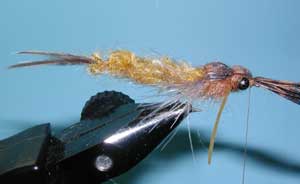
4. Apply a thin thread base to the hook. Attach bead chain eyes about 1 eye length behind the eye. Attach the abdomen piece to the top of the hook shank with the herl tail with an upward slant. |
|
|
|
5. Attach the abdomen piece to the top of the hook shank with the herl tail with an upward slant. |
|
|
|
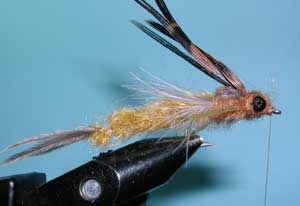
6. Attach about 6-7 marabou fibers (Gills) on each side to the hook shank butting up against the abdomen base. The Gills should be about one half the abdomen length. |
|
|
| 7. Attach two strips of turkey tail segments that are over each other behind the eyes. | |
|
|
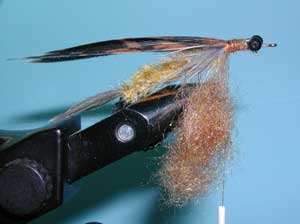
8. Attach a clump of dubbing to the thorax area. Using a loose rope-dub technique. |
|
|
|
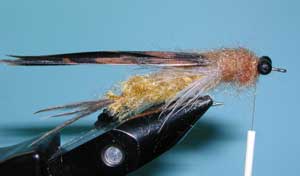
9. Use a dubbing brush to tease out the dubbing. Tie off and trim the excess. The thorax should be wider than the abdomen. The top of the thorax should be trimmed short and the bottom slightly. |
|
|
|
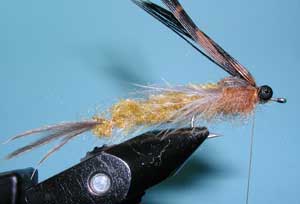
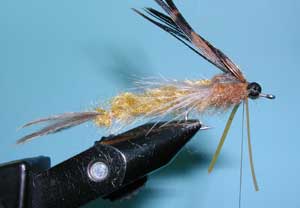
10. Pull the Turkey tail strips over the thorax and secure one at a time. Pull them back over the thorax one at a time and lock into place with thread wraps. Tie in a length of Sili Legs wrapping back so they sweep backwards. Trim the legs so that they just reach the end of the gills. |
|
|
|
11. Tie in a length of Sili Legs wrapping back so they sweep backwards. Trim the legs so that they just reach the end of the gills. |
|
|
|
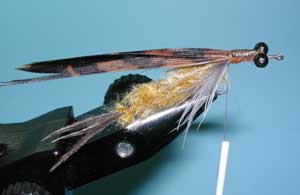
12. Dub a head over the eye. Pull the turkey wing cases forward individually and secure in front of the beadhead eyes. Tie Off |
|
|
|
13. Pull the turkey wing cases forward individually and secure in front of the beadhead eyes. Tie Off |
|
|
|
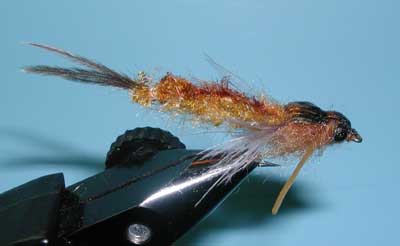
14. Color the top of the abdomen with a tan marker. The belly of the abdomen needs to remain a lighter shade. Also color the top of the thorax on both sides of the turkey. |
|
|
|
15. Apply epoxy to the wingcase. Apply the epoxy with the dubbing needle covering the whole surface including the edges. Then follow-up with another drop in the middle of the wingcase allowing it to smooth on it's own. |
|
©2023 Steve Schalla
This page is not to be copied without
my explicit permission.