
| 1. Create a thread base on the hook shank and bring the thread to a couple of eyelengths behind the eye. |
|
|
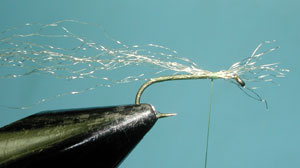
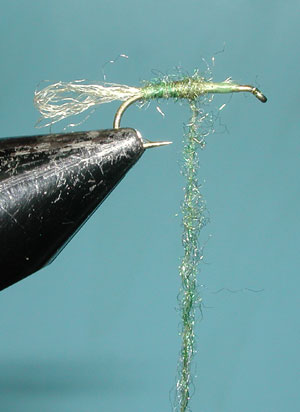
| 2. From that position attach a small number of z-lon strands, about 3 shank lengths or more in overall length, by one end of the bundle. |
|
|
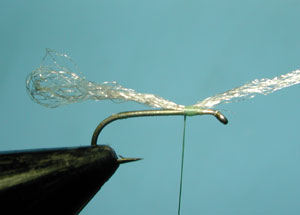
| 3. Twist the Z-lon bundle 1 turn clockwise then loop the Z-lon strand back on itself so that the shuck length is about the same as the hook gap and not as long as the hook shank. Secure the looped strand on the shank just behind the first strand attachment. |
|
|
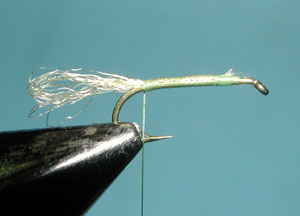
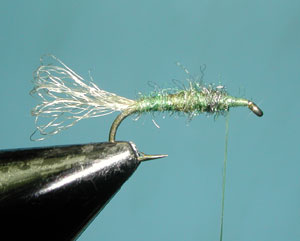
| 4. Trim off the tag ends of the Z-lon shuck. Take your dubbing needle into the loop and twist it a counterclockwise until it is tight. Holding the twisted shuck, secure the shuck with thread wraps to the top of the hook shank to the bend of the hook or wherever you wish the shuck to begin. |
|
|
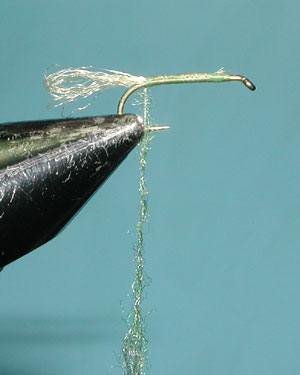
| 5. Dub the body with a thin layer to form a slender body. It's best to apply the dubbing sparingly to get a nice tapered shape. Therefore, you may need to reapply additional dubbing 3-4 times until the body is complete. | |
|
| 6. Here's another application of dubbing. Bring the dubbing to about one eyelength behind the eye and secure with some thread wraps. |
|
|
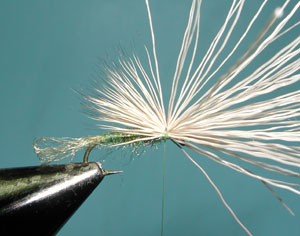
| 7. Apply some wraps of flattened thread between the body and the eye. This will be the foundation for securing the wing. Prior to attaching the wing to the shank, twist the thread tightly in a counterclockwise rotation. This will enable the thread to apply a tight wrap to the hair wing with less slippage. | |
|
| 8. Clip a small bundle of Yearling Elk Hair. Even the tips in a stacker and remove any of the fuzz. Position the hair tips so the the wing does not exceed the bend of the hook. Give 2-3 wraps behind the eye, then lift up the hair butts and give 2 wraps under the butts just behind the eye. | |
|
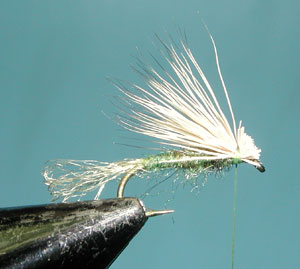
| 9. Lift up the hair butts and trim about a eye width above the eye so that the butt hairs are above the eye. |
|
|
| 10. Apply 6-7 additional wraps around the wing and the shank. Whip Finish and apply head cement on the wraps. | |
©2023 Steve Schalla
This page is not to be copied without
my explicit permission.