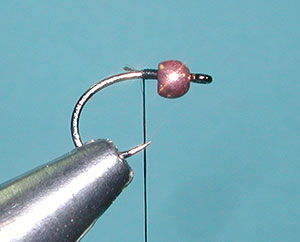
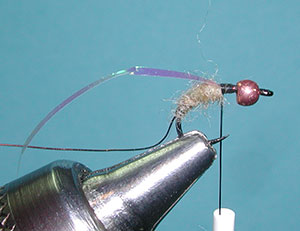
| 1.Slide a Copper bead onto the hook and attach the hook to the vise. Secure the thread behind the bead |
|
|
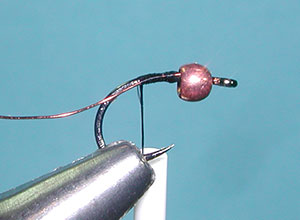
| 2. Attach a wire ribbing to the side of the hook shank. |
|
|
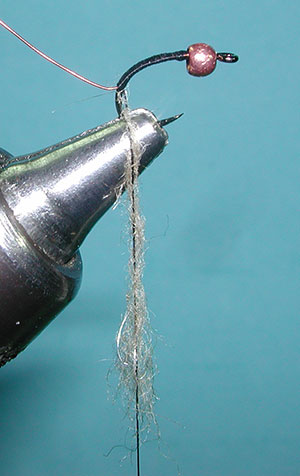
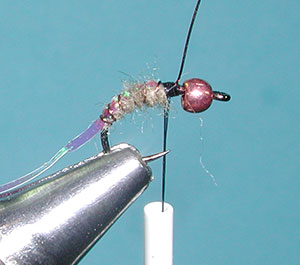
| 3. Secure the wire ribbing along the side of the hook shank to the mid-point of the hook bend with touching thread wraps. Dub the thread with the tan mottled dubbing. Trap the first fibers against the shank with one tight wrap at the bend of the hook. |
|
|
|
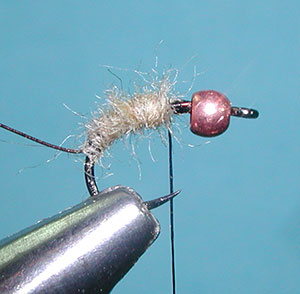
4. Twist the dubbing into a tight rope and wrap towards the bead. Wrap a tapered body as you approach the bead. Leave about a bead width of space open for the thorax and shroud. |
|
|
|
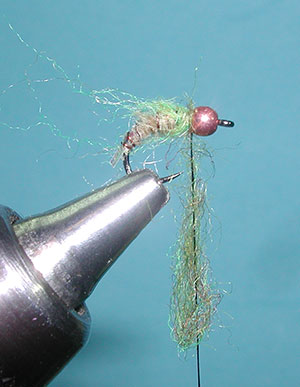
5. Attach a piece of small Pearlescent tinsel onto the top of the shank behind the bead with the tage end over the bend of the hook. |
|
|
|
6. Secure the tinsel as a flashback over the top of the abdomen with spirol wire wraps up to the bead. Secure the wire ribbing with thread wraps and "helicopter" the tag end of the wire for a clean break. |
|
|
|
7. Trim off the tag end of the flashback material and apply a light olive Mottled Nymph dubbing to the thread loosely. Wrap the dubbing in front of the abdomen, stroking the material back toward the bend of the hook. Apply a second layer of a darker olive Mottled Nymph dubbing to the thread. |
|
|
|
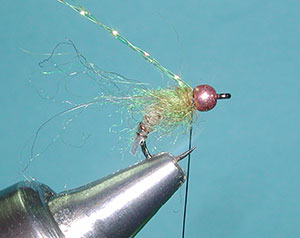
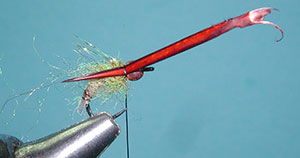
8. Wrap the dubbing in front of the light olive later for a thorax. Secure a strand of krystalflash for an underwing. |
|
|
|
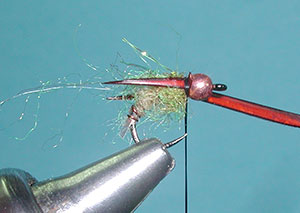
9. Place a dark goose biot on either side of the hook shank behind the bead. Adjust the biot length so that it does not exceed the length of the hook. |
|
|
|
10. Trim off the tag end of the first biot and secure the second biot to the other side. |
|
|
|
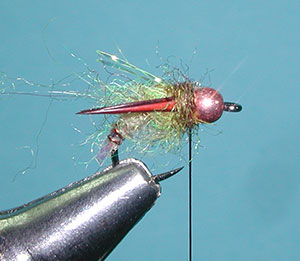
11. Trim off the tag end of the second biot and apply a brownish olive dubbing to the thread wrapping the dubbing behind the bead. |
|
|
|
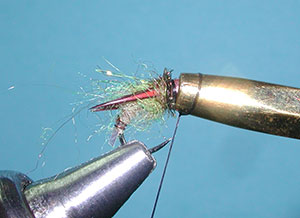
12. Secure a single strand of peacock herl just behind the bead. |
|
|
|
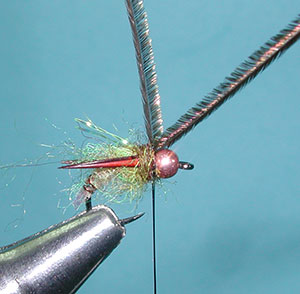
13. Wrap the herl twice behind the bead and secure with thread wraps. Trim off the tag ends of the herl. |
|
|
|
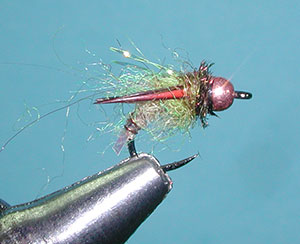
14. Apply a couple of half hitches behind the bead and trim off the thread. |
|
|
|
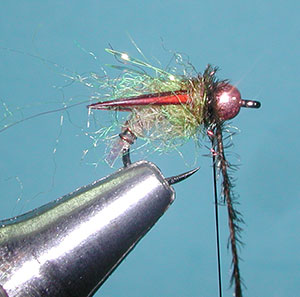
15. The finished Yuba Pupa. |
|
|
©2023 Steve Schalla
This page is not to be copied without
my explicit permission.